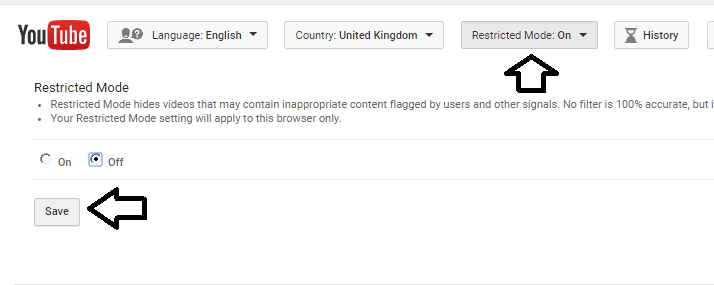
If Youtube is hiding videos when searching due to "Restricted Mode", Like this:
Fix
You can try turning it off at the bottom of the Youtube page by clicking on the "Restricted Mode" button.
Still not working?
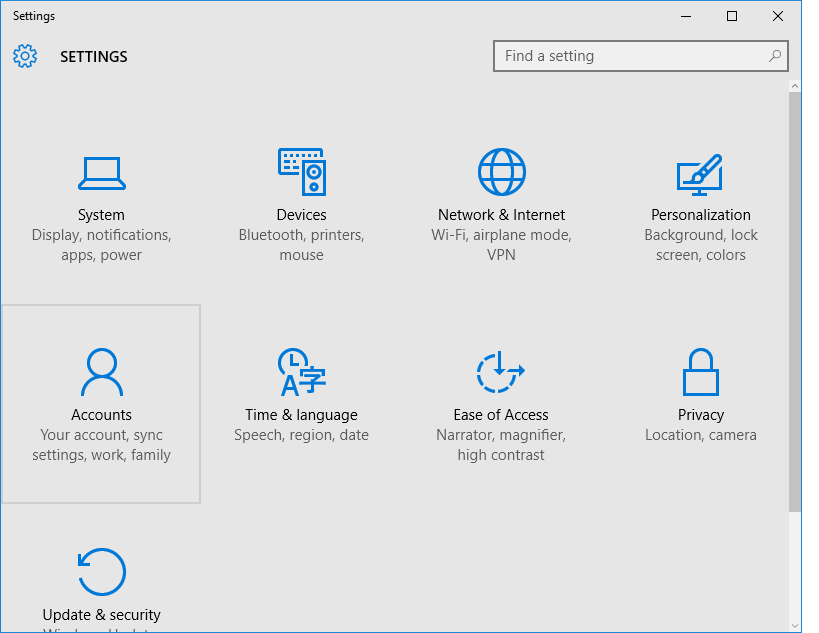
If this is not saving and restricted mode keeps turning back "ON" & you have a Windows 10 PC - you might have family mode enabled, To turn this off, type settings in the start menu and open the main settings dialog (See Picture Below). Click Accounts (the picture with the person)
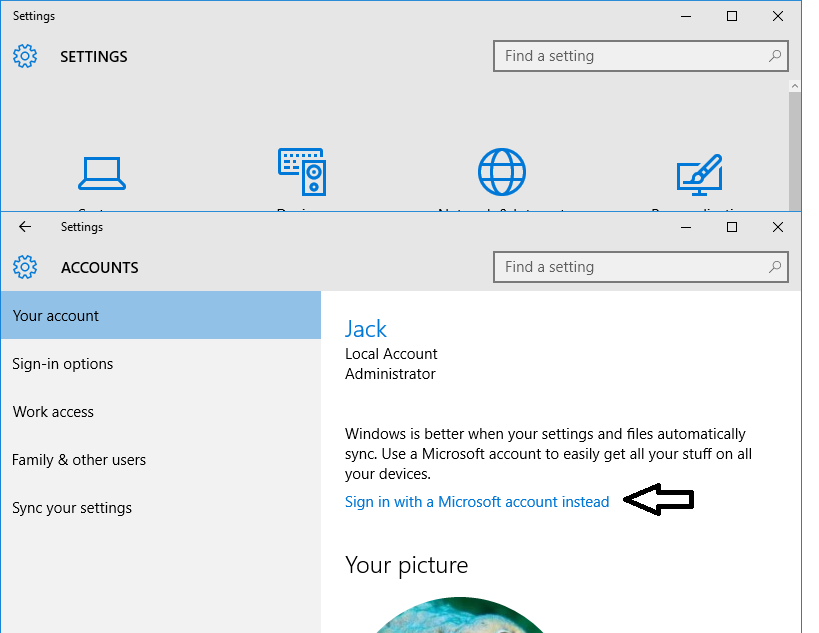
In the accounts dialog you"ll need to click "Sign out of Microsoft Account and use Local Account Instead". You"ll need to provide your Microsoft account password and then make a new password for your PC.
This will disconnect you from all family settings
Now try turning off restricted mode again (from the bottom of the Youtube page), and you"ll see the setting now saves!
I hate using external libraries, so my main aim with this was to not require any 3rd party libraries, although you"ll need .Net framework 4.5 for the BigInteger classes.
Please note the full process of generating a valid bitcoin address is defined as:
Private Key > Public Key > Address
This tutorial concentrates on the last step.
If you want to generate a Private/Public pair you can use a bitcoin wallet or look into using http://www.bouncycastle.org/csharp/ to create a valid pair within C#.
9 Steps verbose
Here we have all 9 steps as per the technical background document written in C#. Each step is written to the console to show the progress of making the address.
Byte to hex converts a byte into a hexadecimal string
byte[] data = { 1, 2, 4, 8, 16, 32 };
string hex = BitConverter.ToString(data);
SHA256
Sha256 uses Microsoft"s security cryptography include, and by default takes a byte array (this function is bad in the sense It creates duplicate instances of the sha manager, which we probably shouldn"t do as we could reuse the same instance for the 3 times)
public static byte[] Sha256(byte [] array)
{
    SHA256Managed hashstring = new SHA256Managed();
    return hashstring.ComputeHash(array);
}
RipeMD160
Again this function uses Microsoft"s security cryptography include and is pretty much identical to the Sha256 function.
public static byte[] RipeMD160(byte[] array)
{
    RIPEMD160Managed hashstring = new RIPEMD160Managed();
    return hashstring.ComputeHash(array);
}
Append Bitcoin Network
AppendBitcoinNetwork simply pre-appends a byte onto the beginning of an array of bytes
public static byte[] AppendBitcoinNetwork(byte[] RipeHash, byte Network)
Concat address appends the last 4 bytes of the hash onto the end of the RipeMD160 value
public static byte[] ConcatAddress(byte[] RipeHash, byte[] Checksum)
{
    byte[] ret = new byte[RipeHash.Length + 4];
    Array.Copy(RipeHash, ret, RipeHash.Length);
    Array.Copy(Checksum, 0, ret, RipeHash.Length, 4);
    return ret;
}
Base58
I"ve hacked together my own c# Base58 encoder based off the C++ code by Satoshi, notice it uses BigInterger, this is a new Microsoft class in C# that allows math operation on arbitrary big numbers, so we"re no longer limited to a 32 or 64 bit integer, see more here:
Check out the final stages of the build after the jump
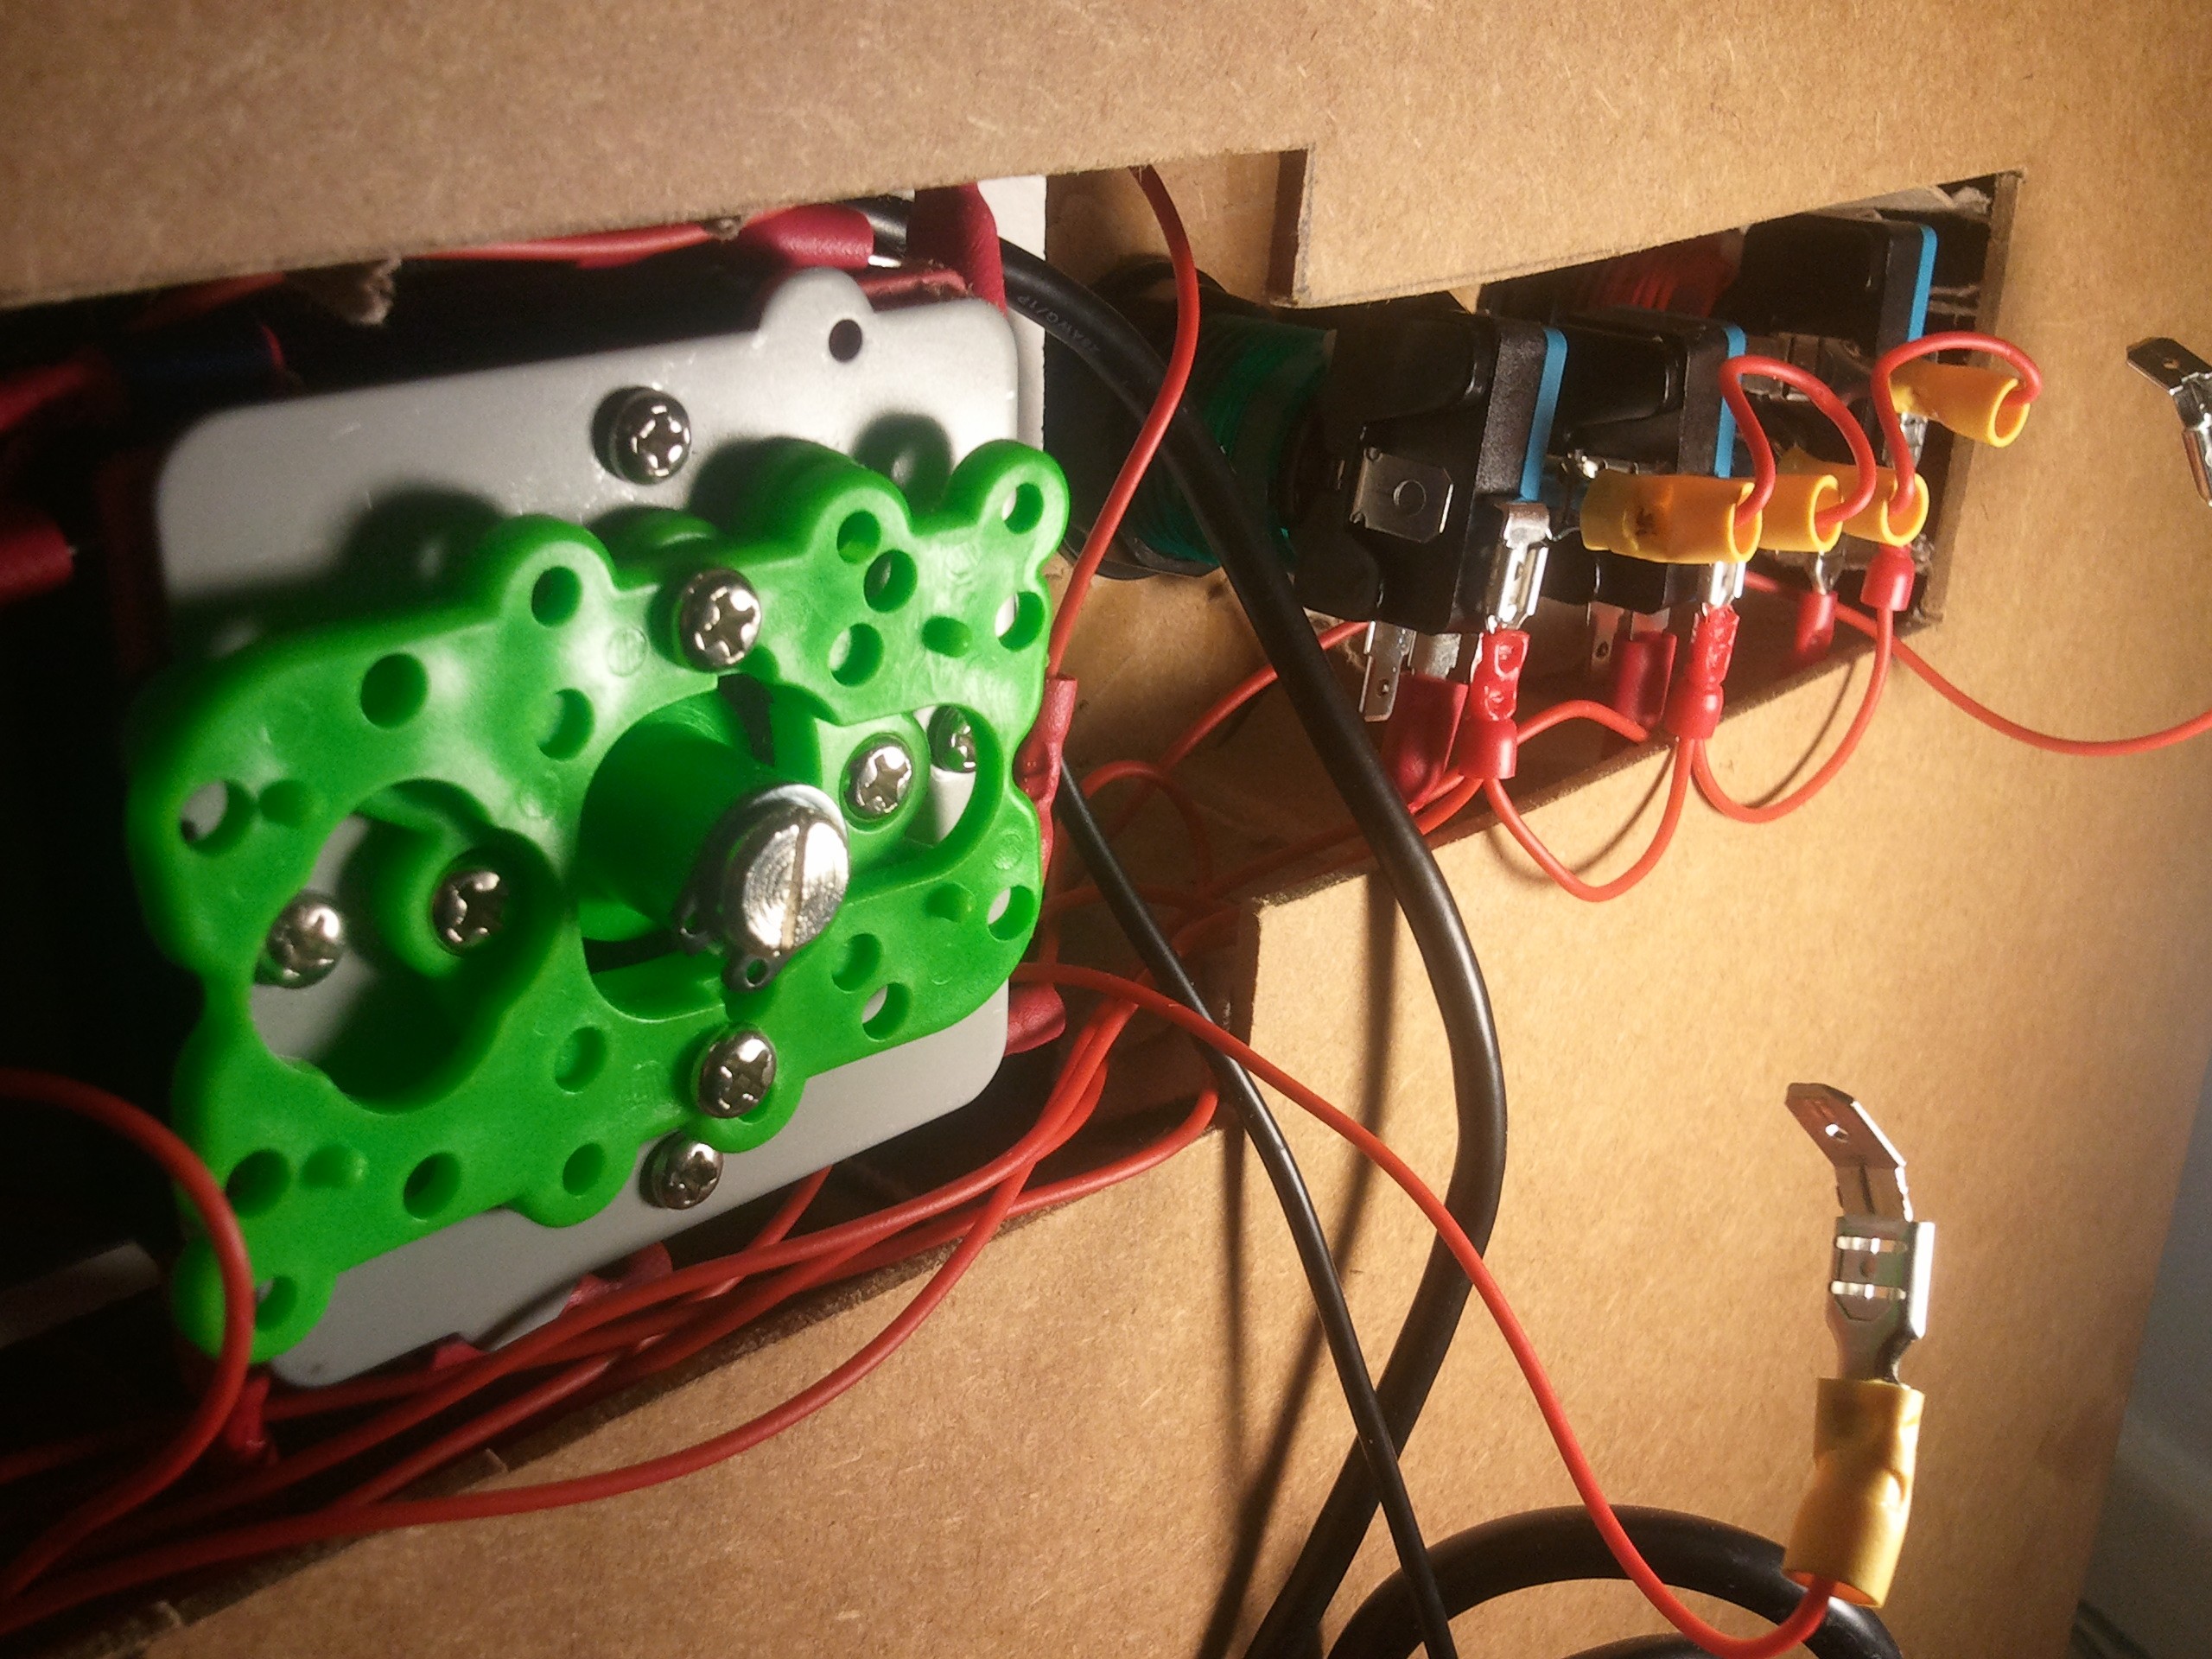
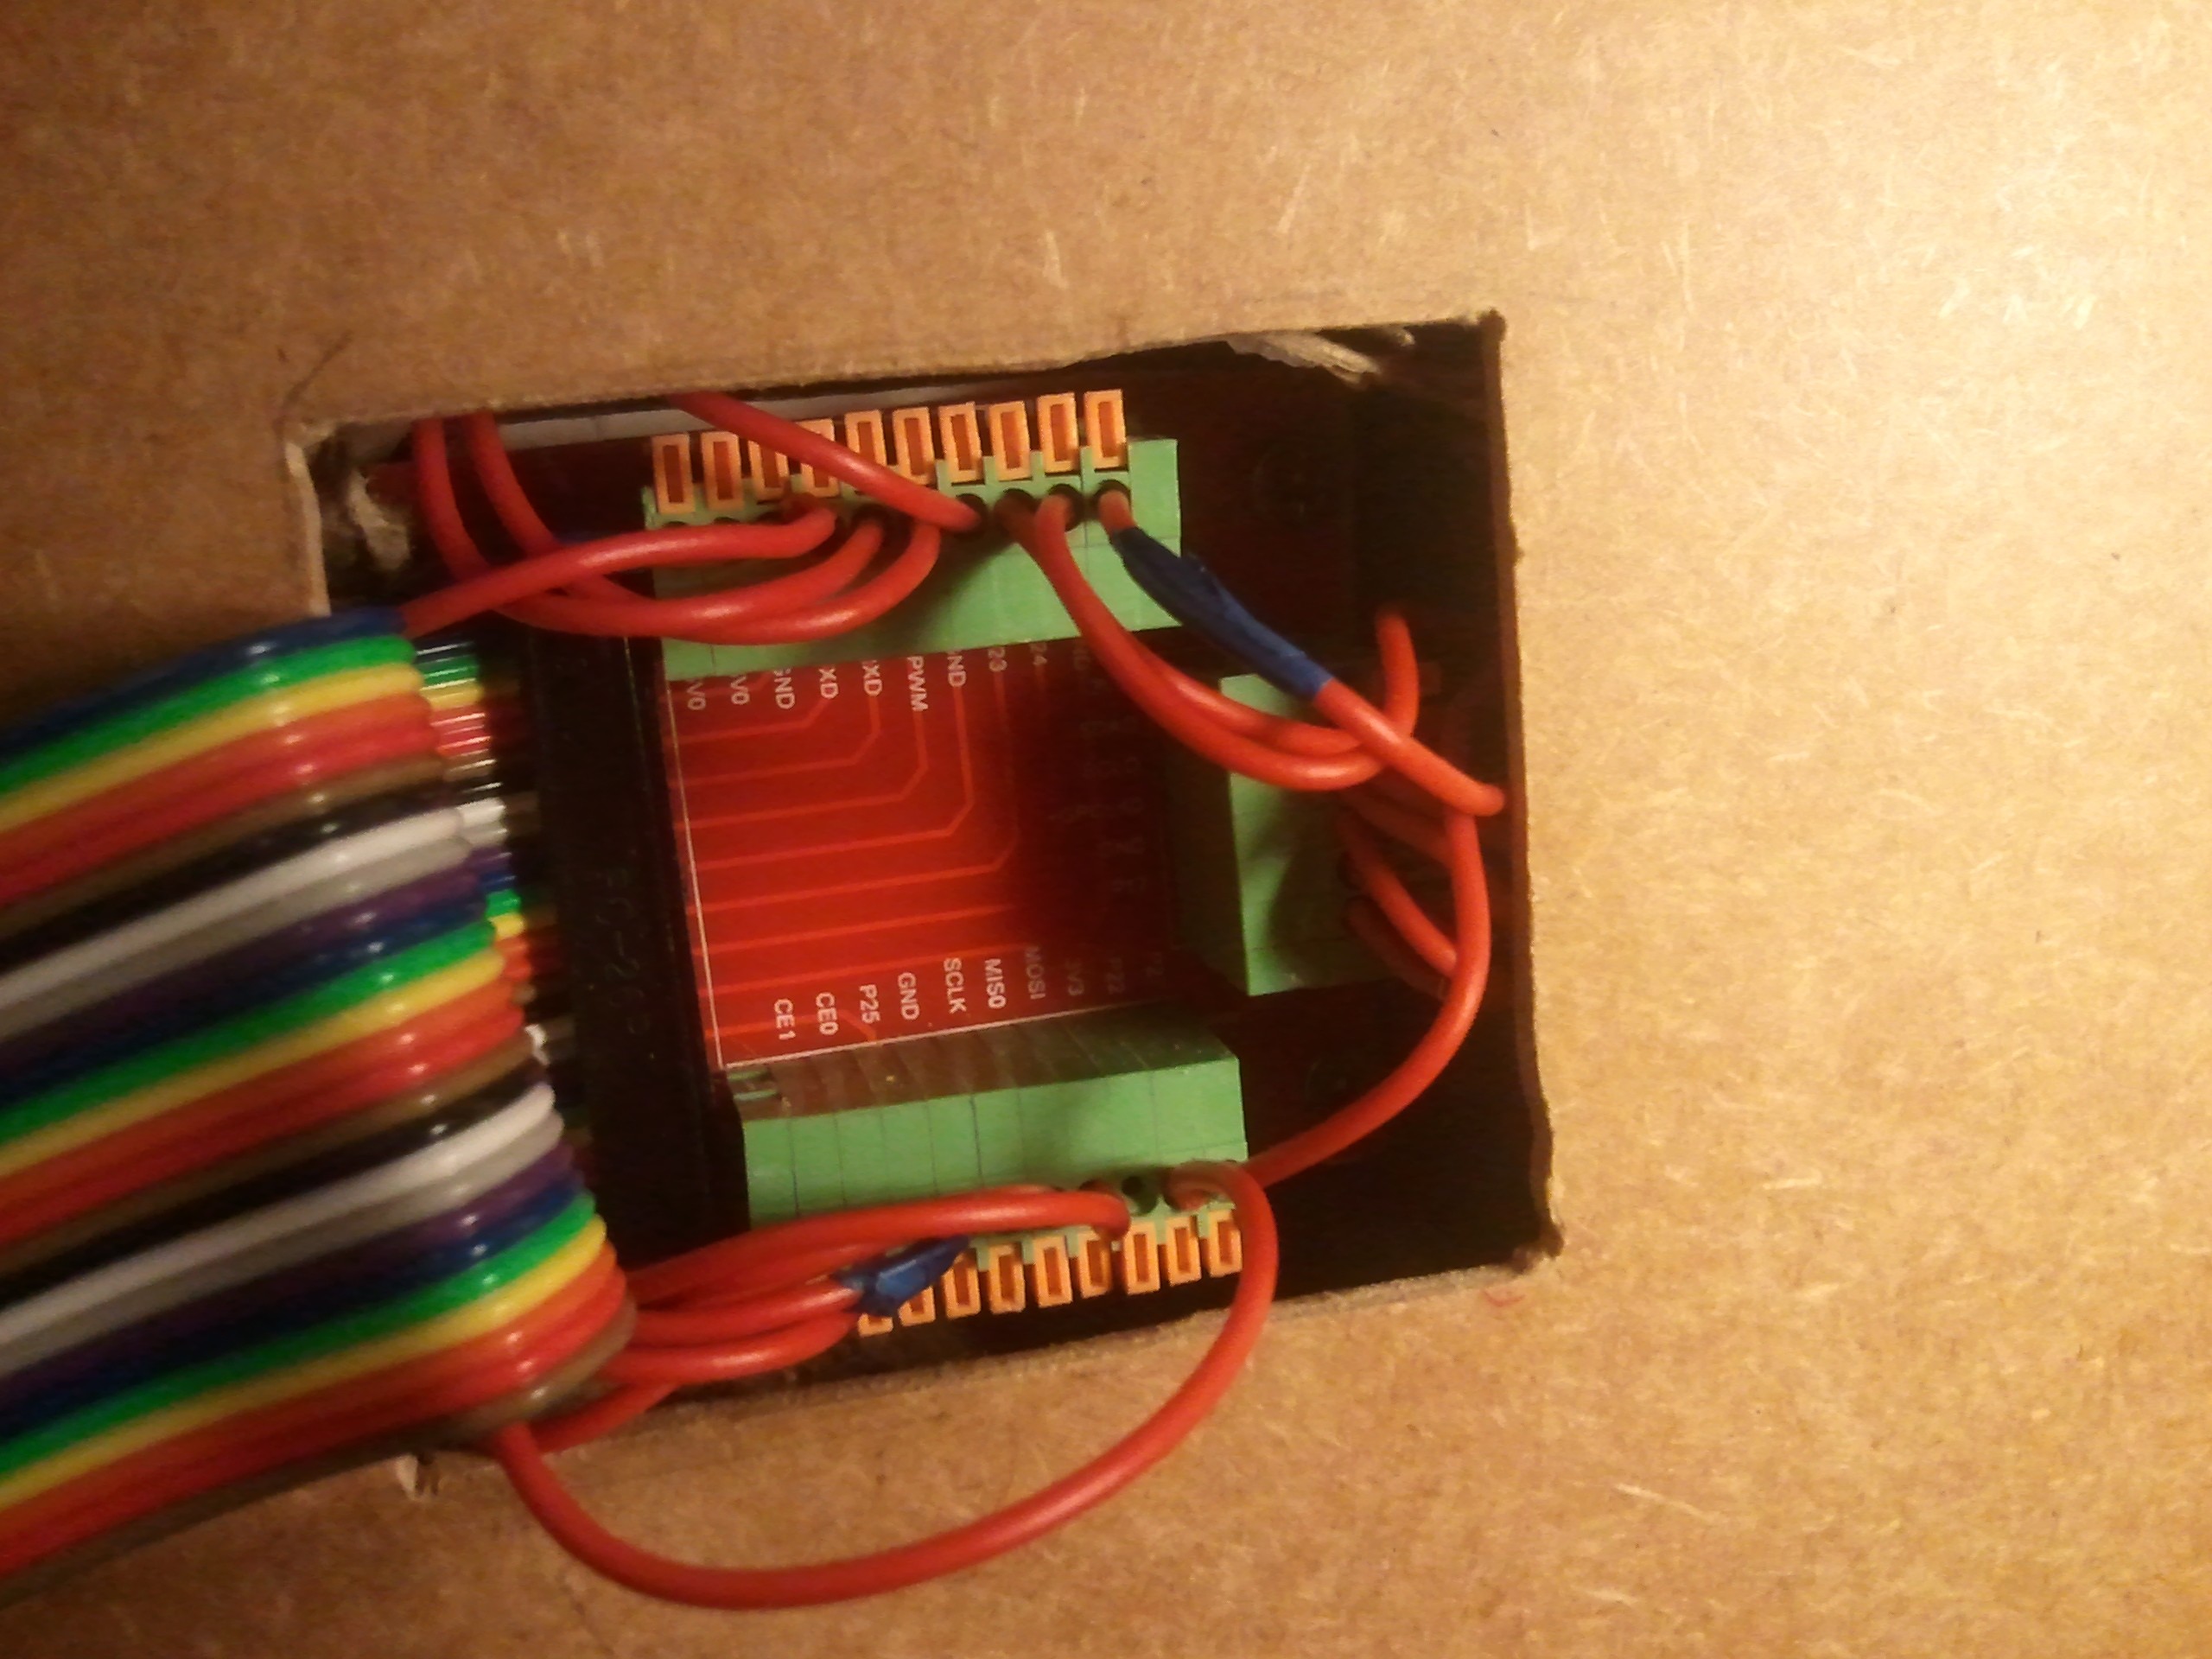
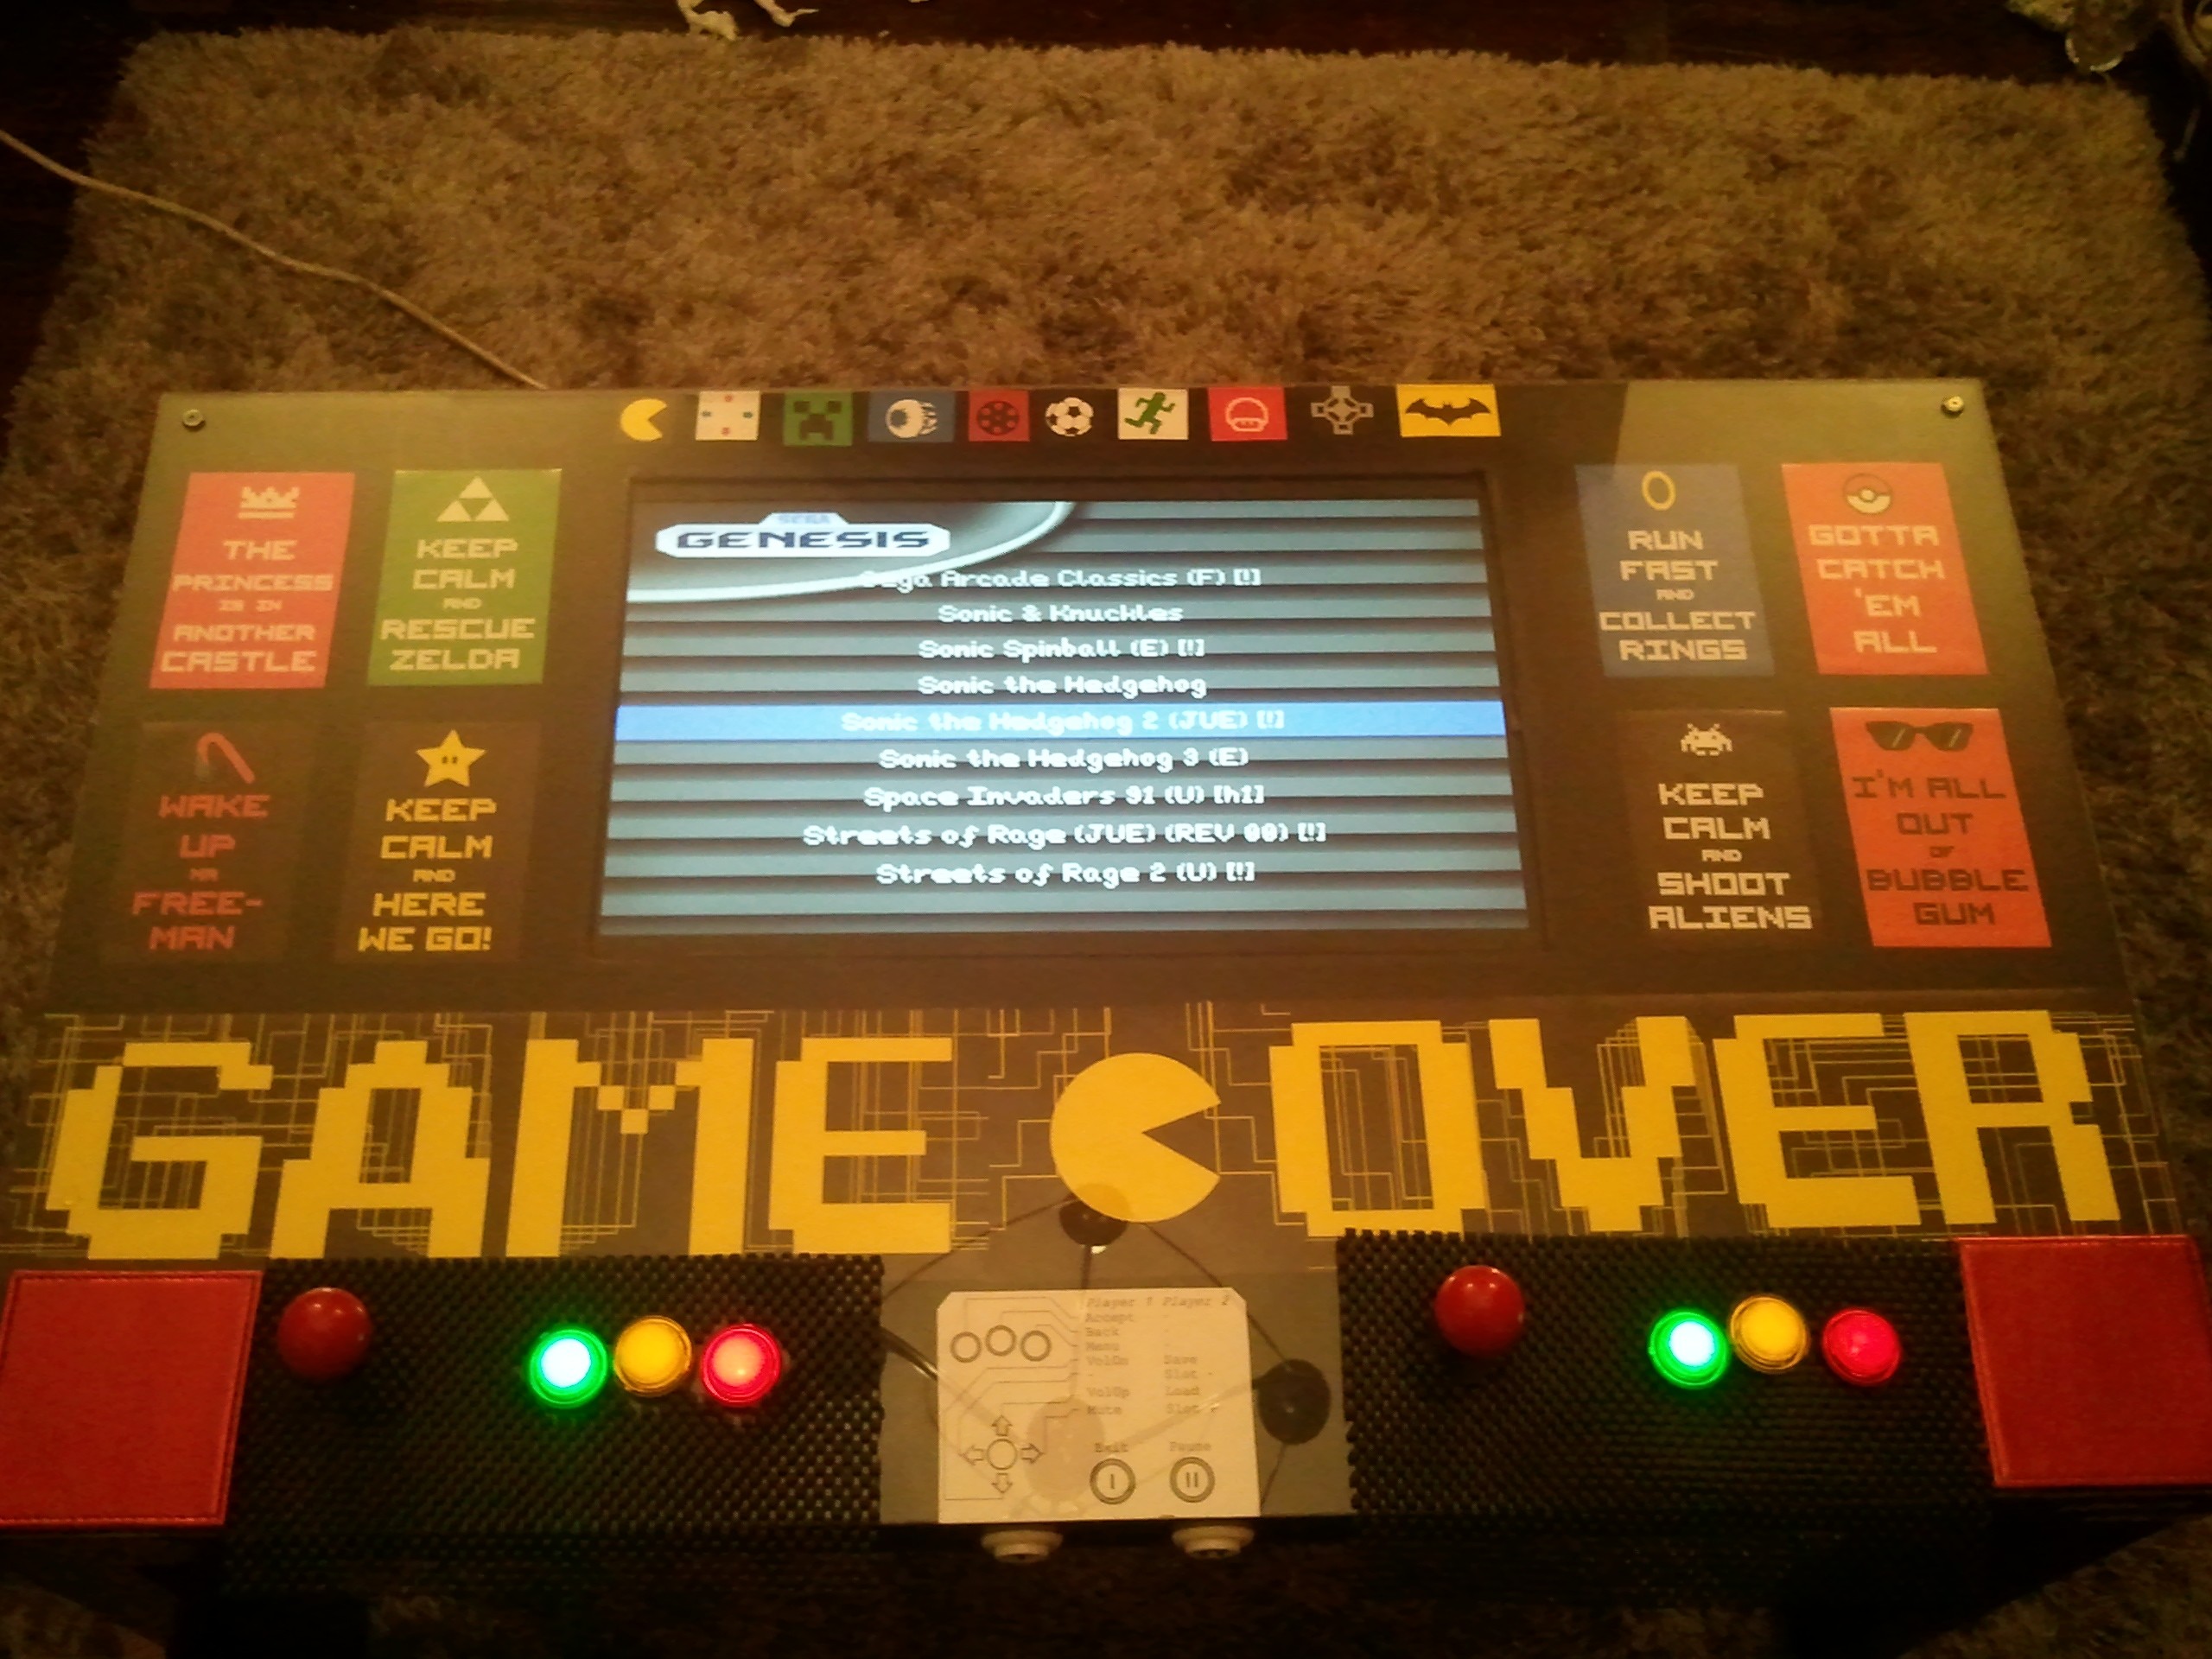
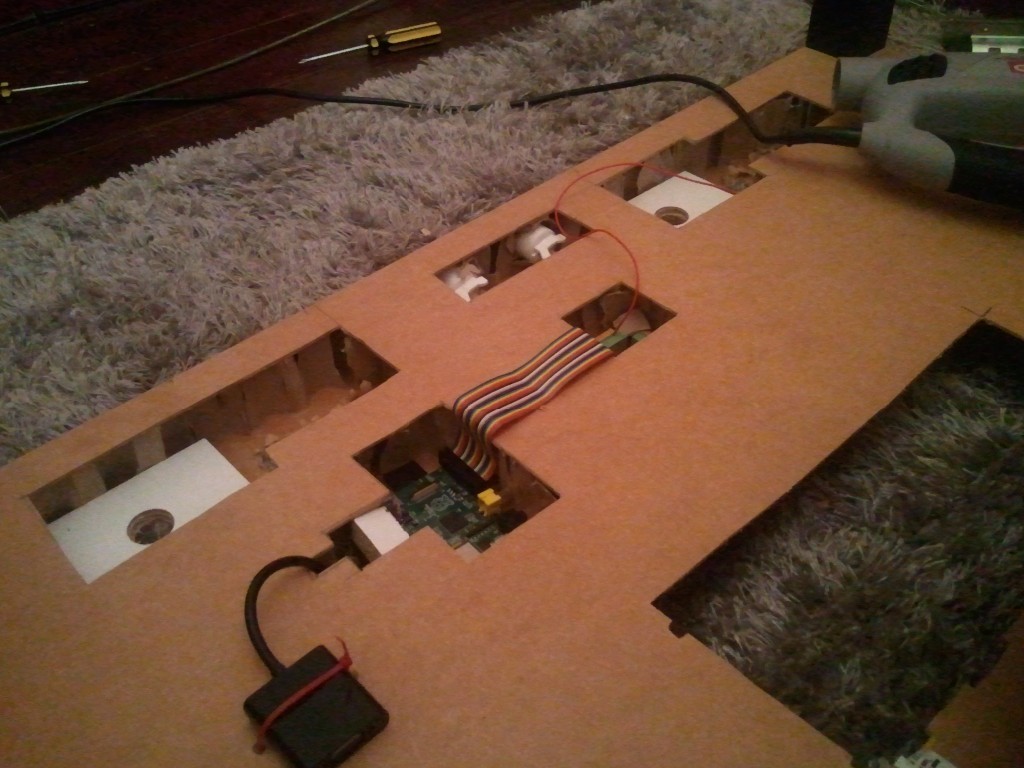
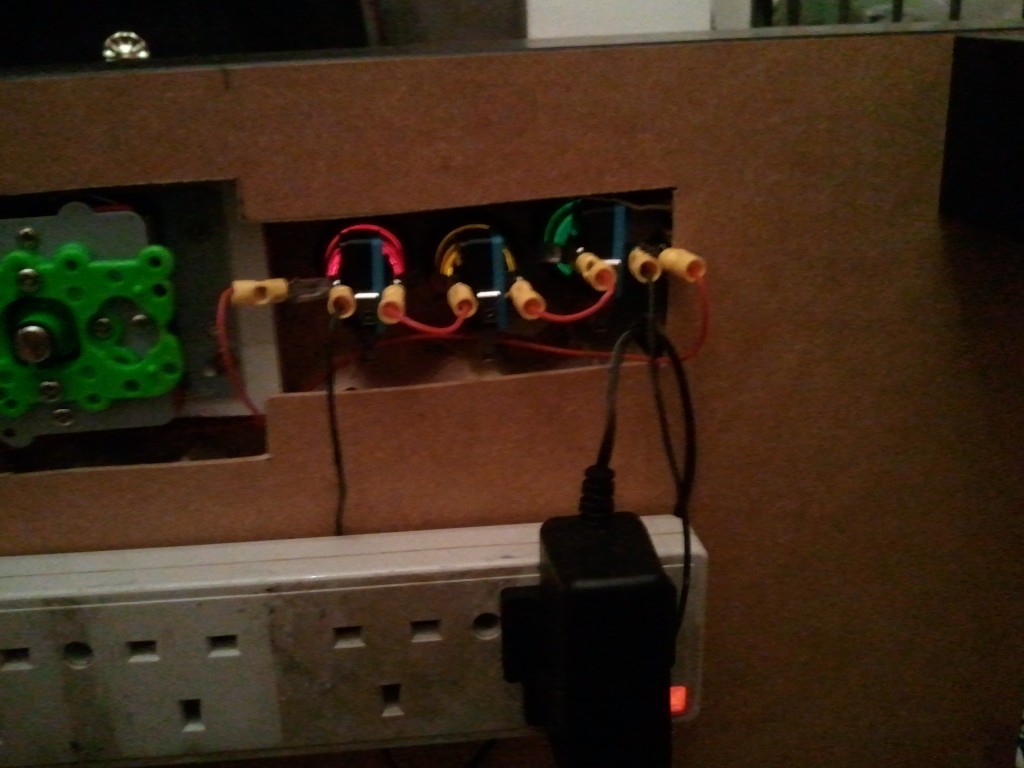
The joysticks and buttons are now all wired up, using about 10m of cable and a load of 4.8mm spade connectors.
All the cables lead into the GPIO board, there are a total of 5 Ground lines (P1 Joystick, P2 Joystick, P1 Buttons, P2 Buttons, Start/Select/Coin In Buttons) and the switch simply connects each output to the ground.
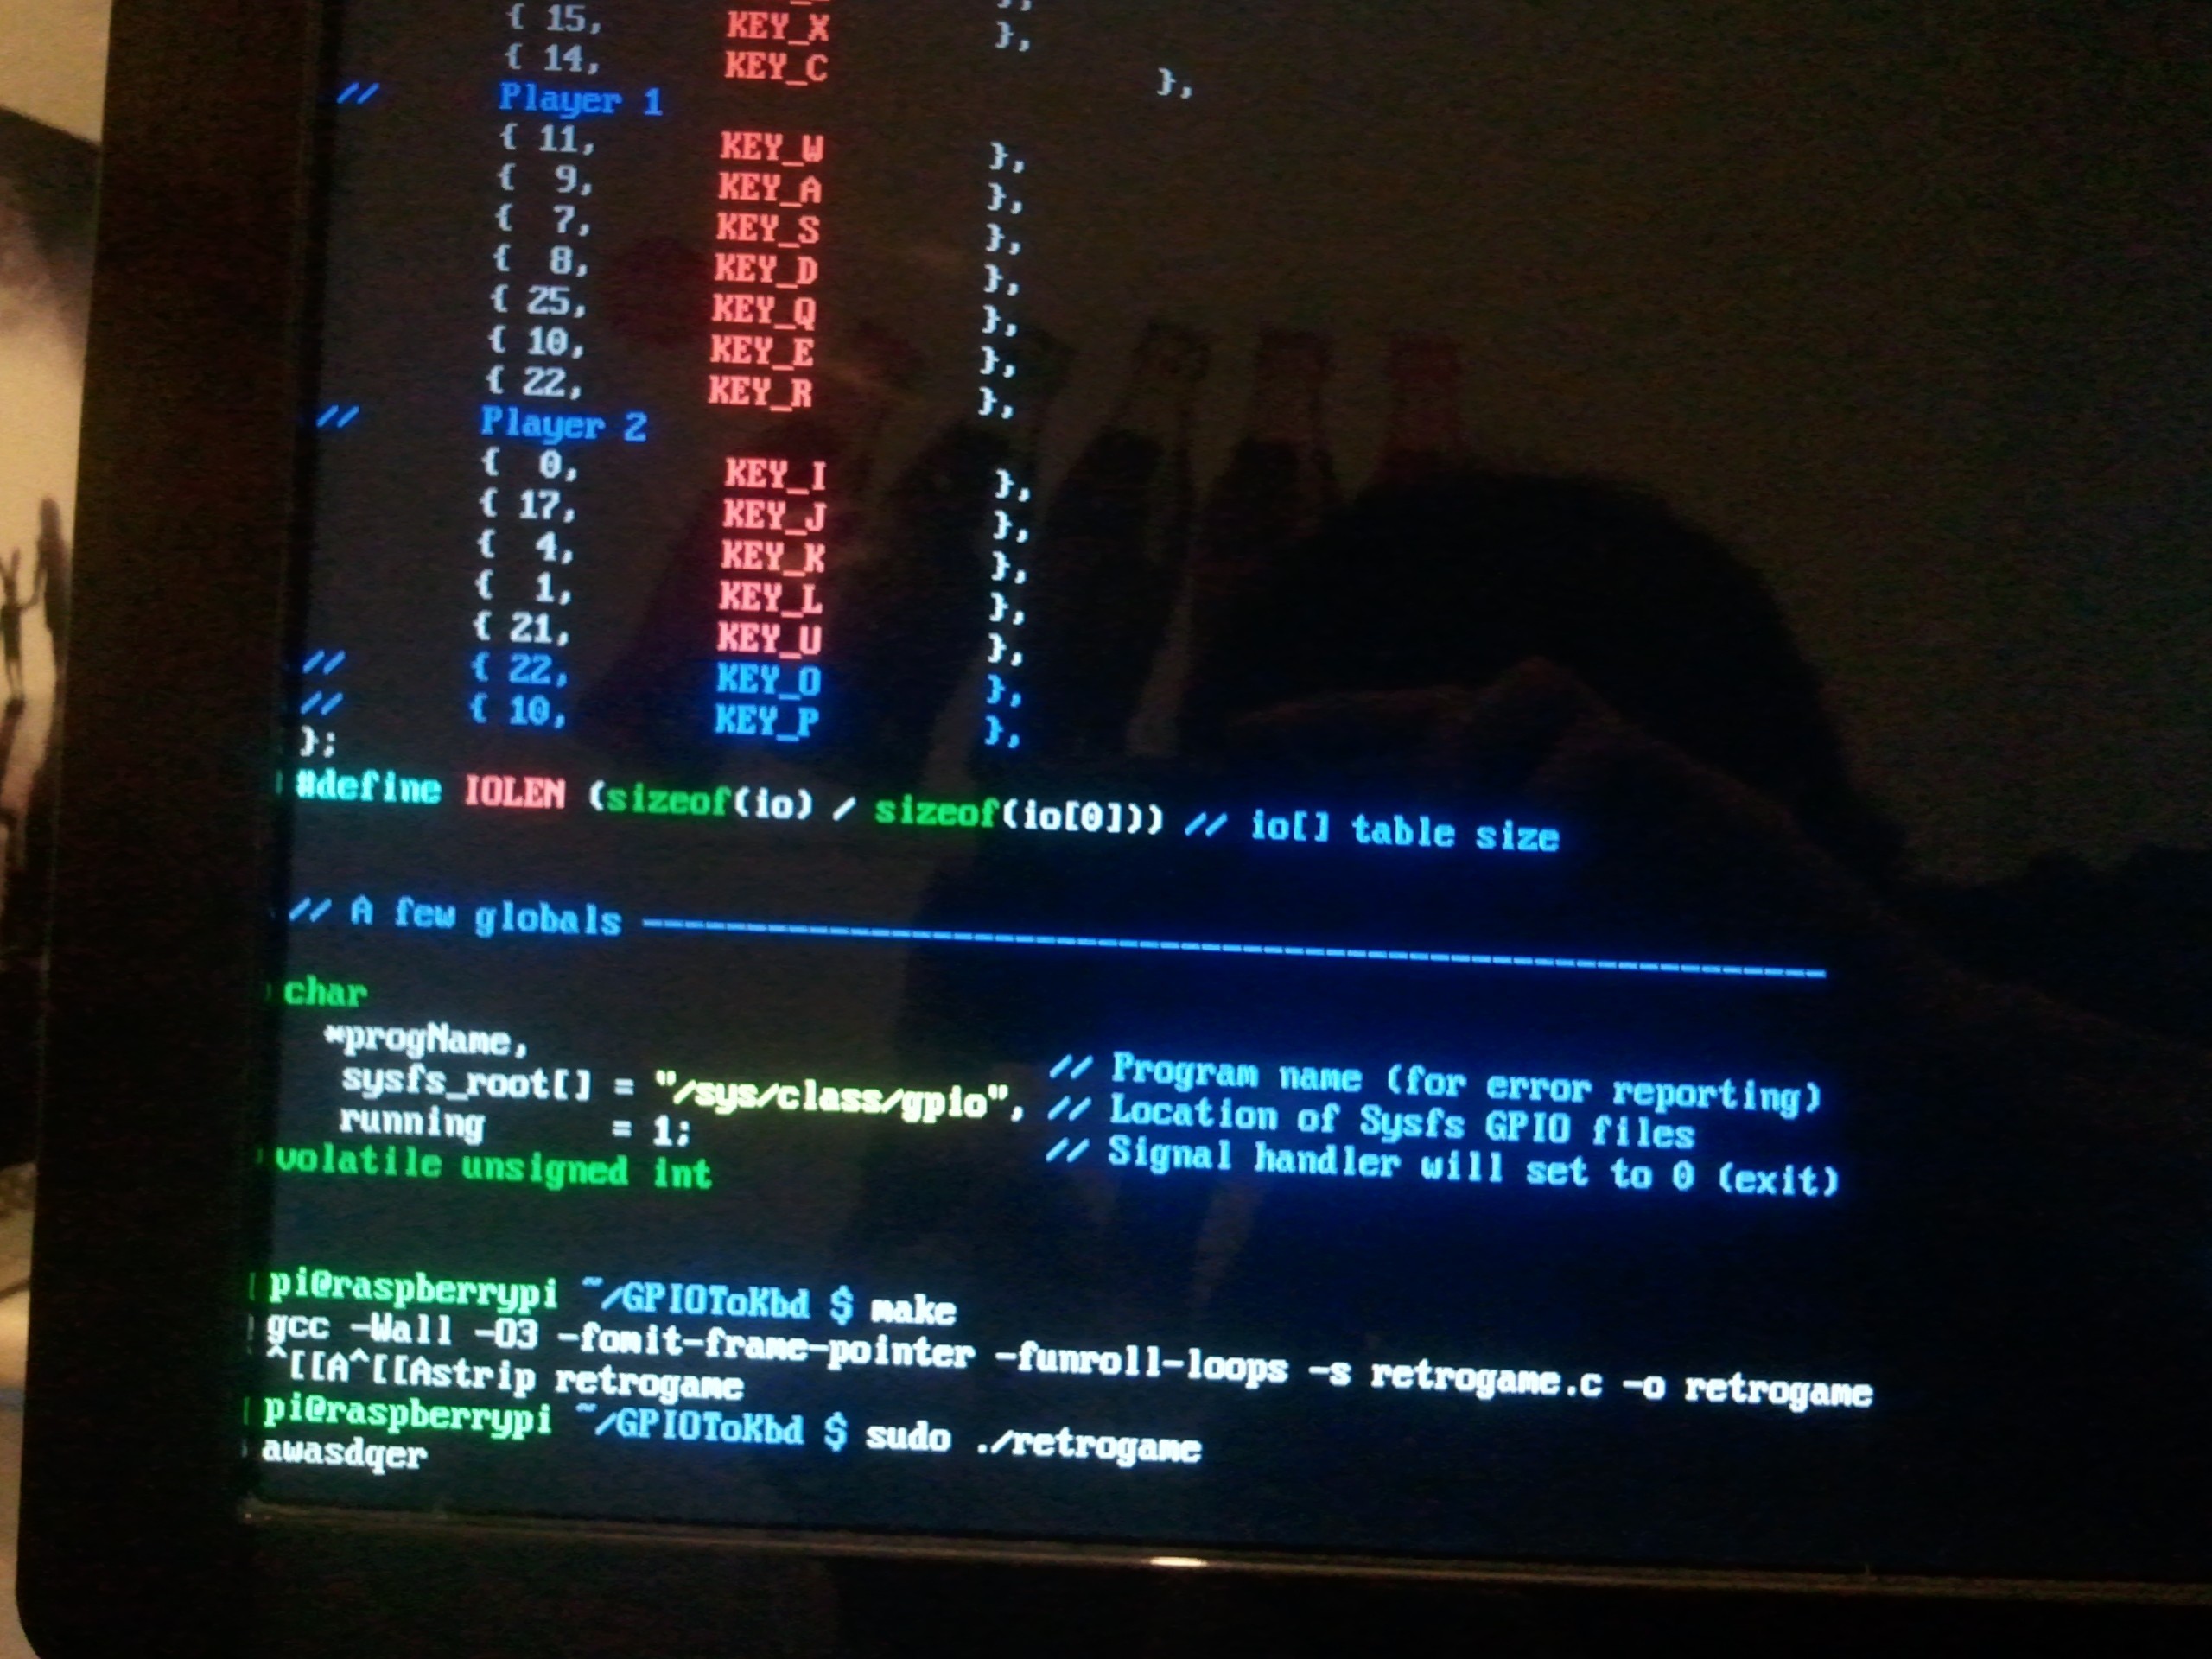
A script provided by Adafruit (RetroGame), scans the raspberrys GPIO pins and converts them into virtual keyboard presses
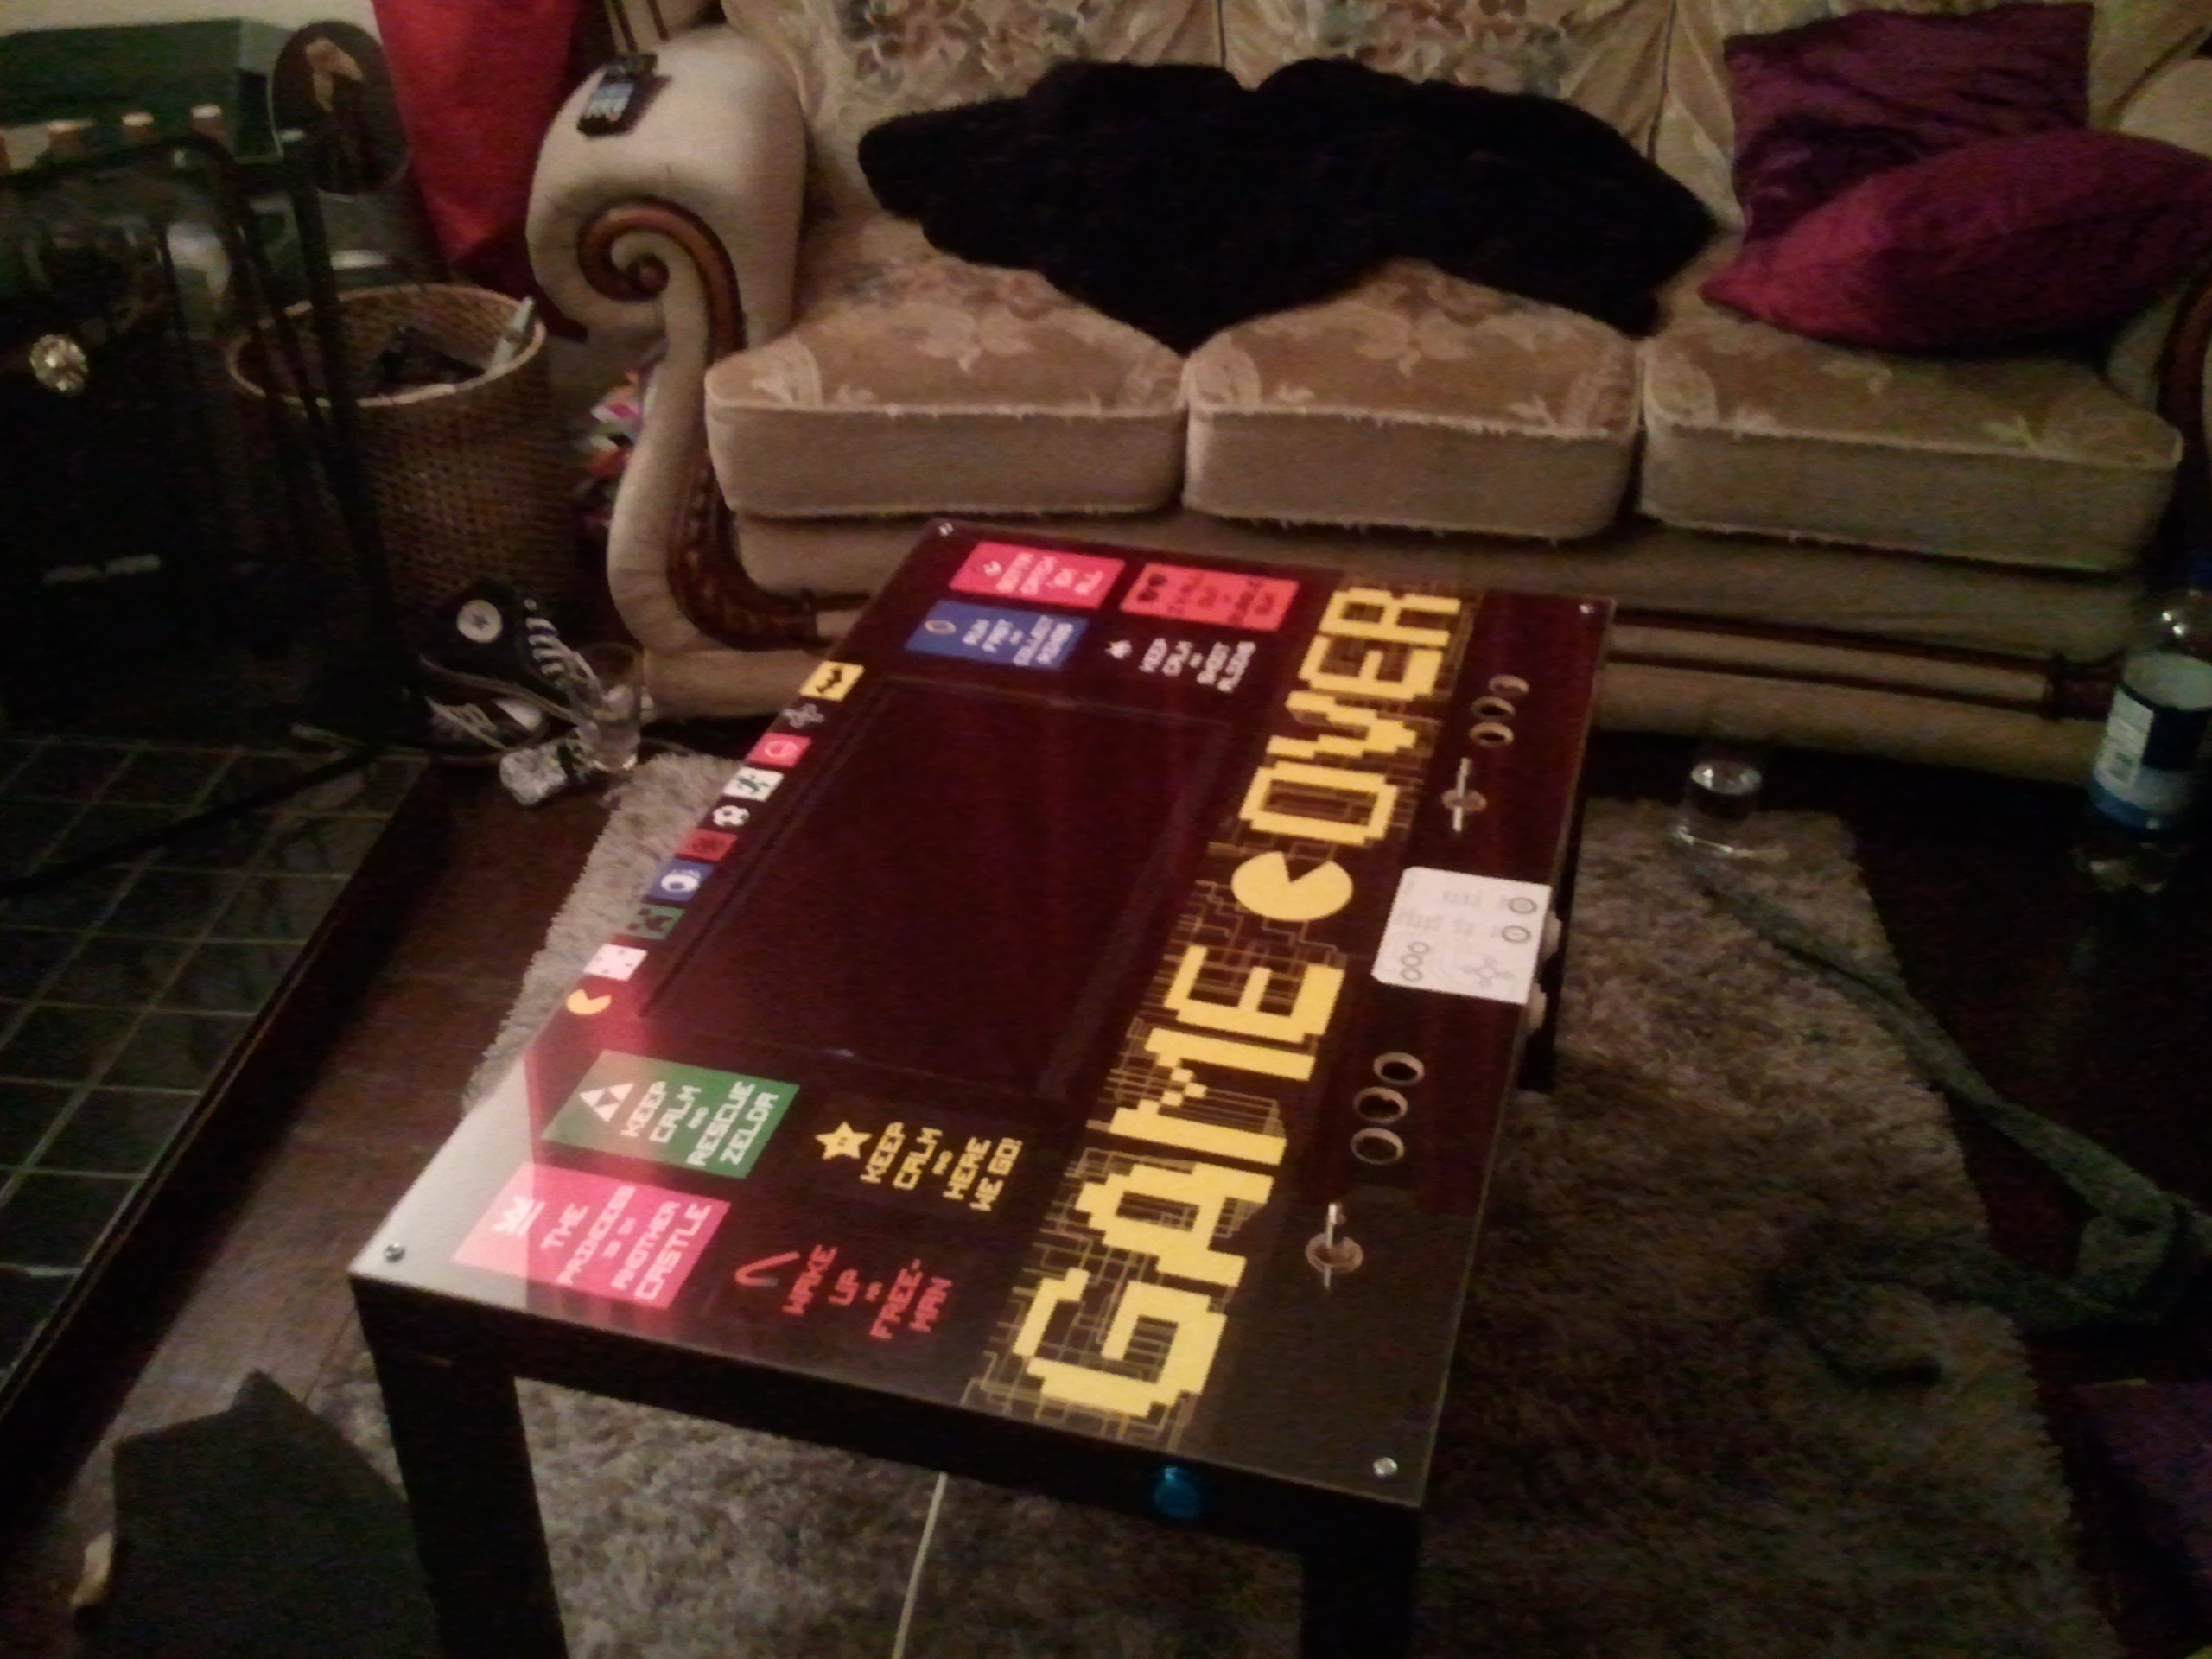
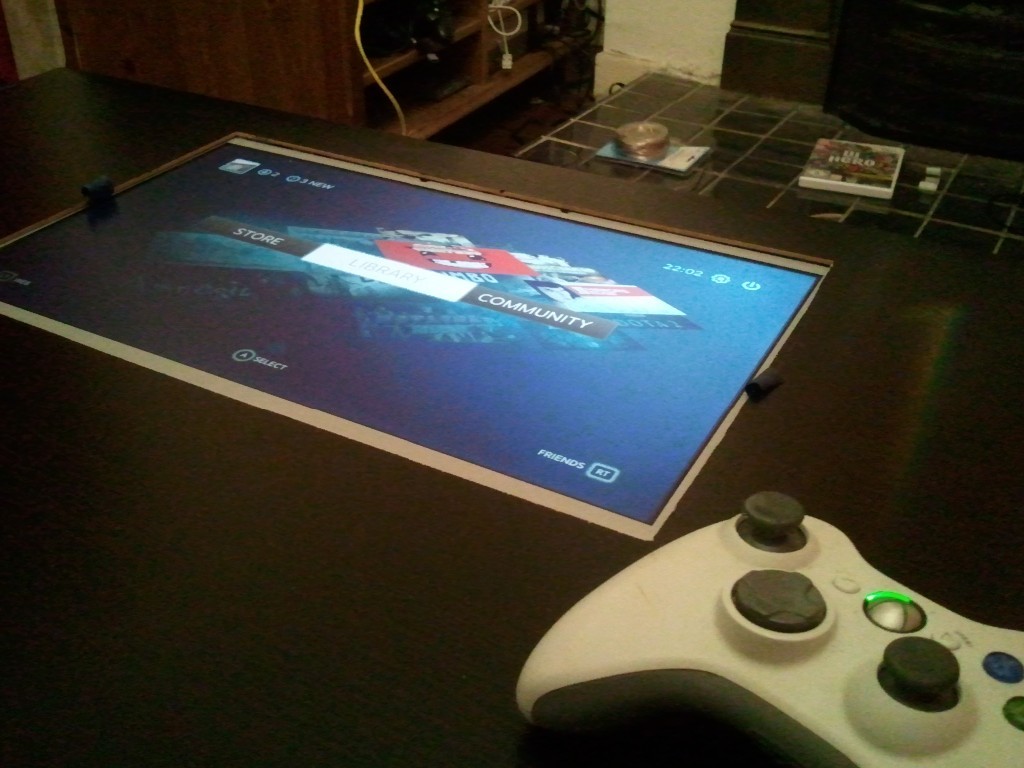
The screen was made Dust Tight using electrical tape over both the table edges and the screen bezel, the electrical tape layers then creates a nice seal between each other
The perspex was then fitted ontop, using 4 screws and a dipped washer. Some posters found in a local supermarket were cut up and used to theme the table.
After owning my Raspberry PI for aR year, I decided it was time to actually do something useful with it.
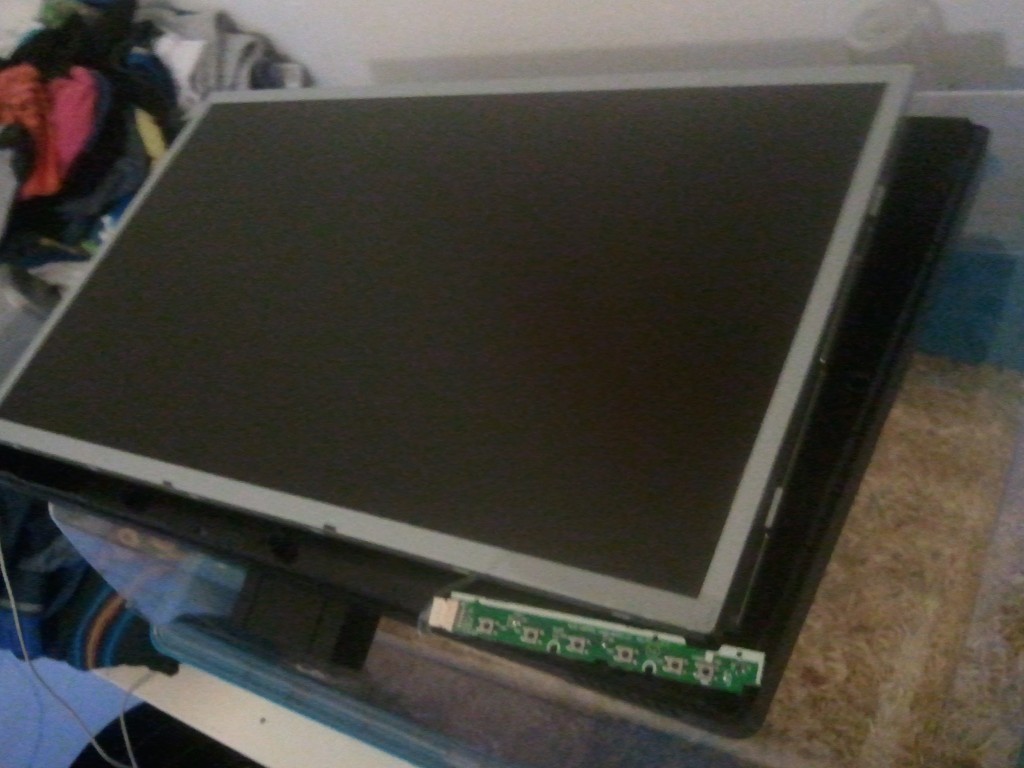
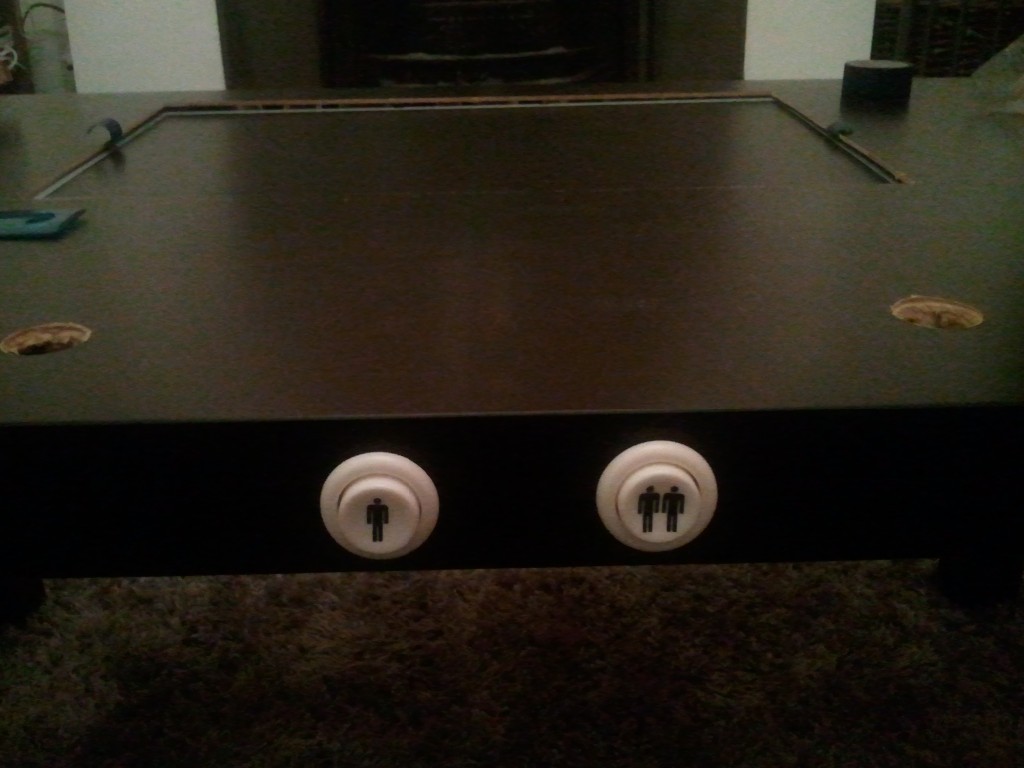
I"ve decided to ruin my girlfriends coffee table and convert it into a fully functioning arcade cabinet for entertaining guests.
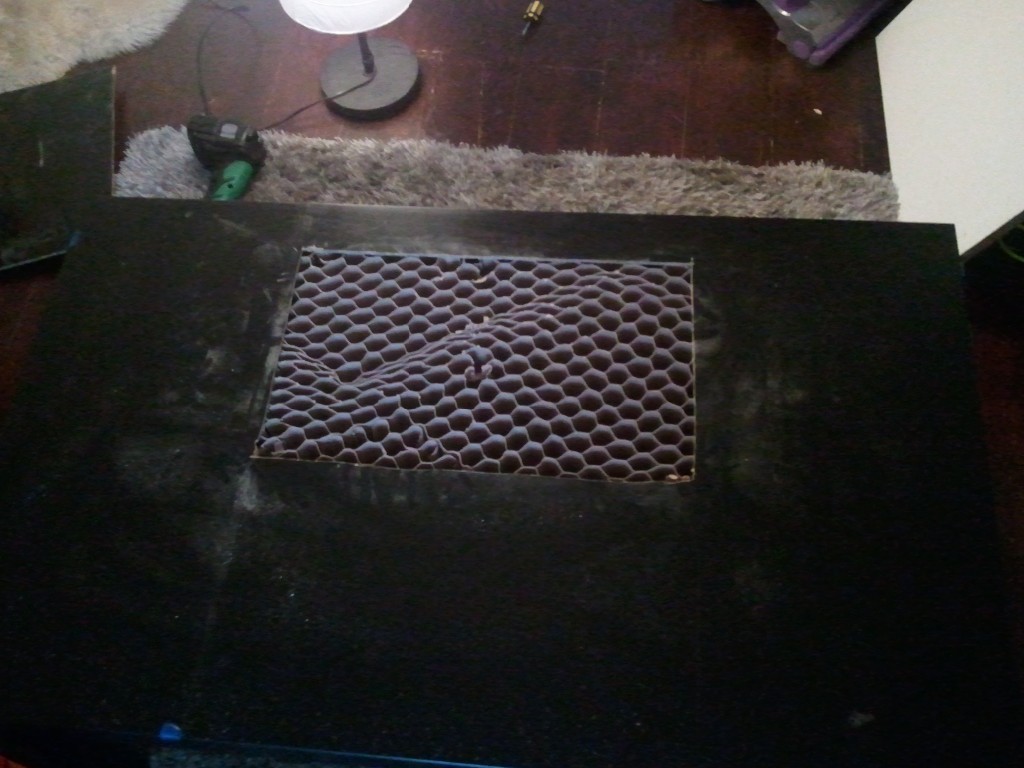
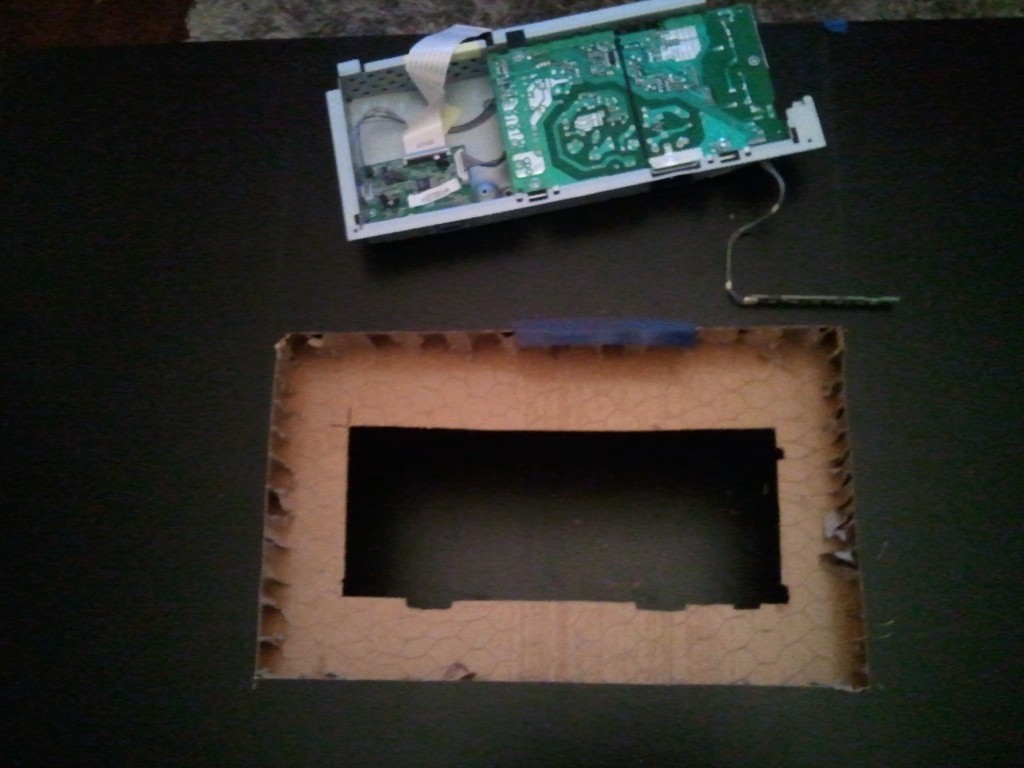
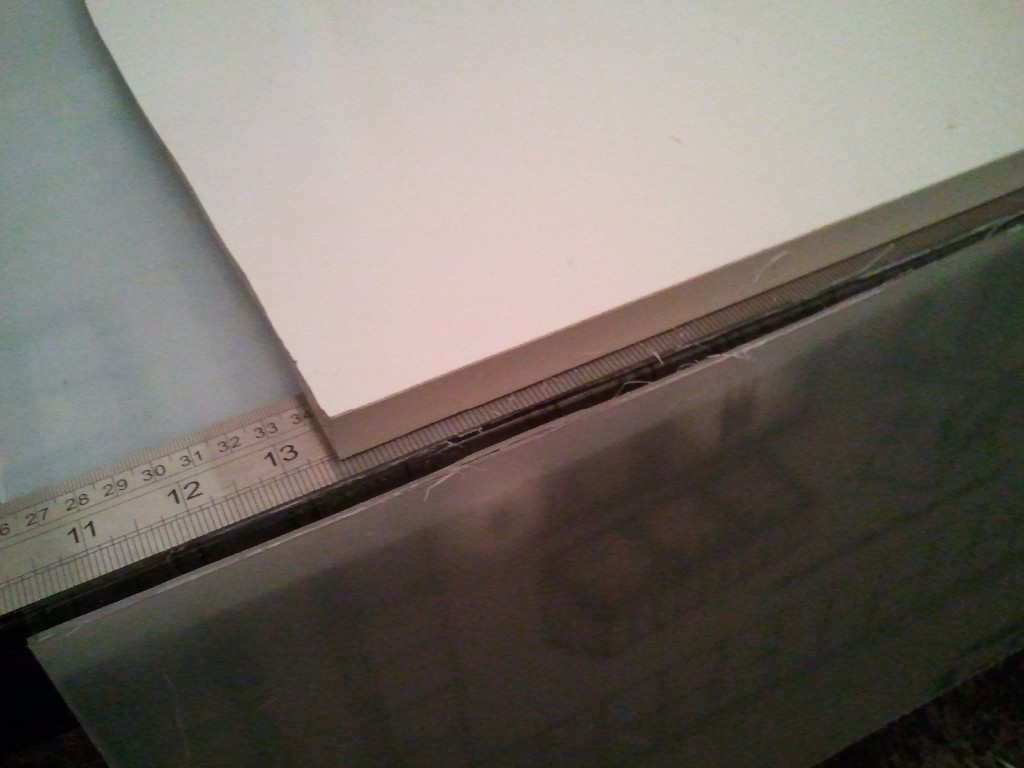
The Victim, the table is a £16 IKEA Lack table. its filled with cardboard making it very easy to work with. Here you can faintly see I"ve roughly drawn lines to cut out for the monitor. Shockingly I did this with a 30cm ruler
Insert description
Very badly cut hole. The cardboard can just be pulled out using your hands
I scored a cheap monitor off Ebay, unfortunately it was VGA only, meaning It wasn"t so cheap after buying a HMDI to VGA adapter for the PI. The resolution is pretty poor, but for old arcade games it does not matter at all, in any case it should help speed the games up with having less pixels to render.
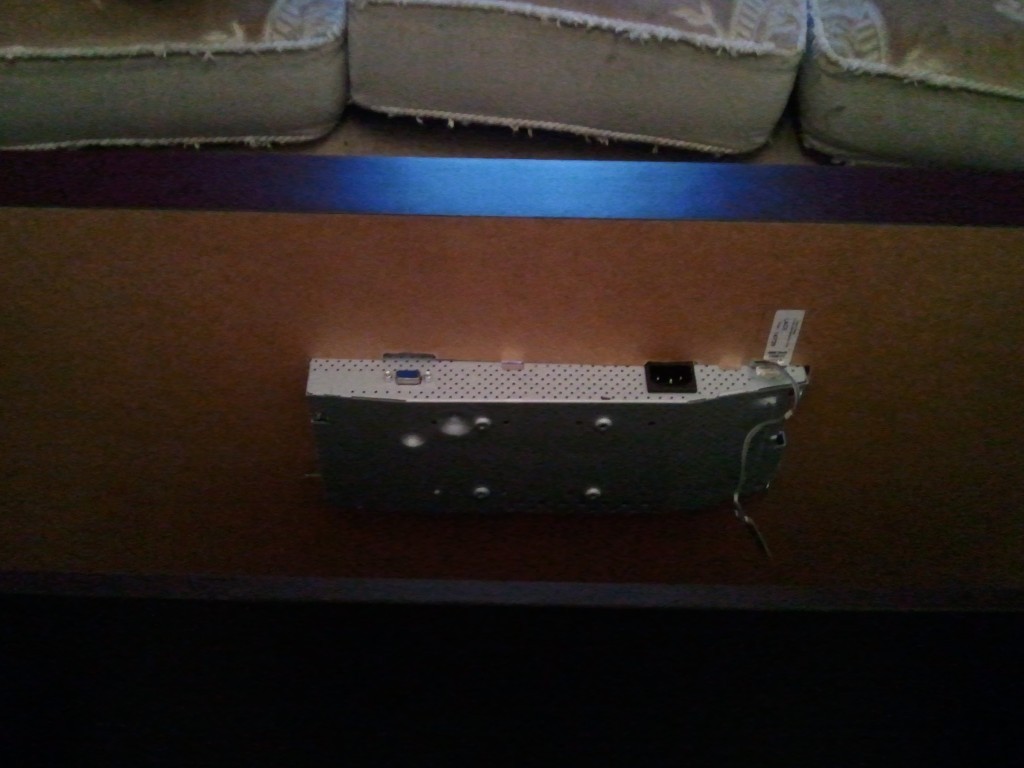
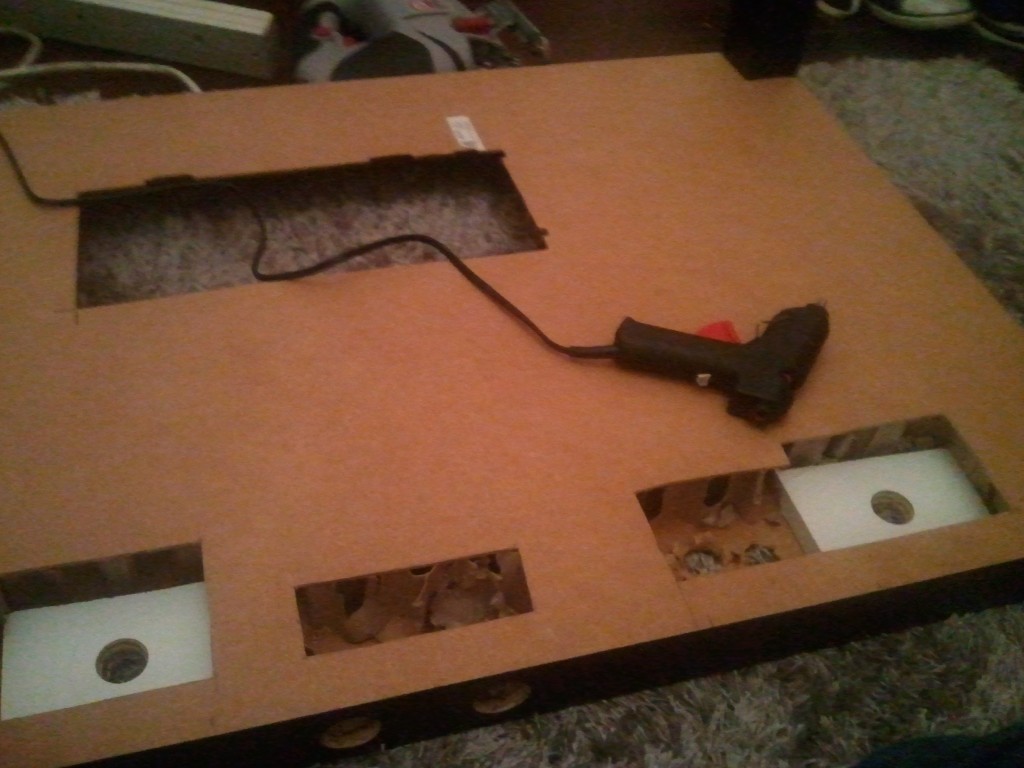
The monitor unfortunately had it"s transformer inbuilt, unlike newer monitors have a power brick (Should of done my research!). A hole had to be cut to hold this in place and allow air circulation.
Once in, it did not look too shabby, and allowed easy access to the vga port to plug in a laptop etc.
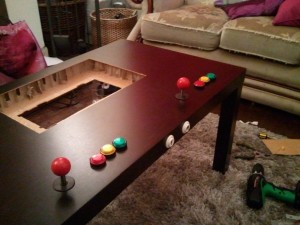
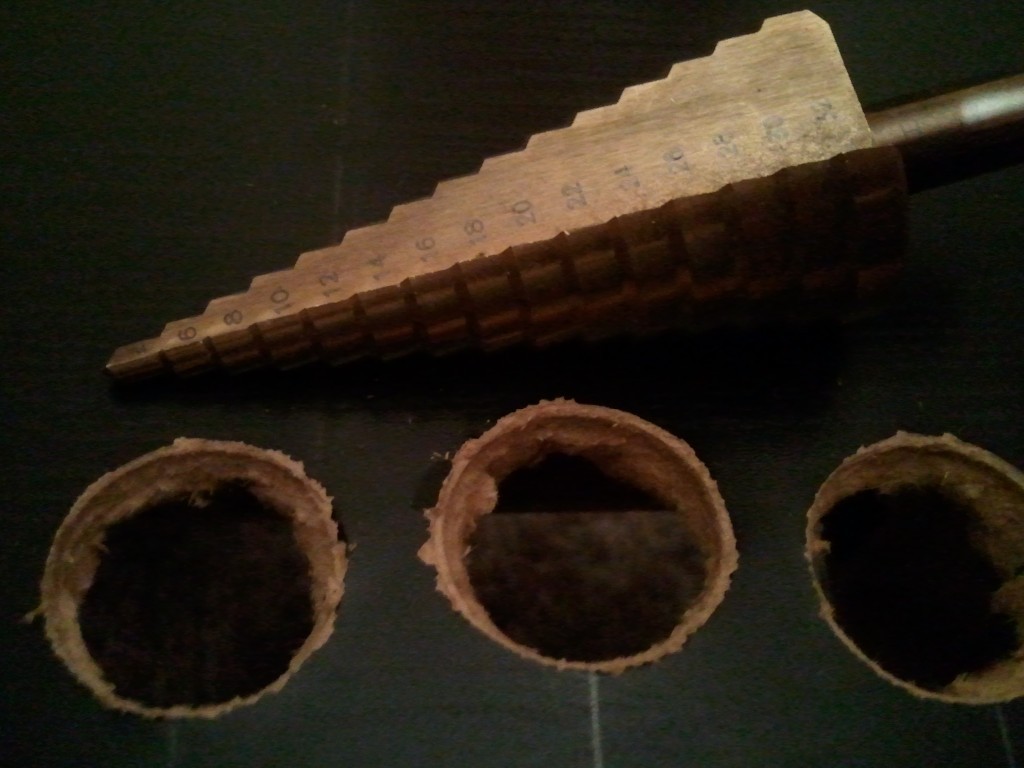
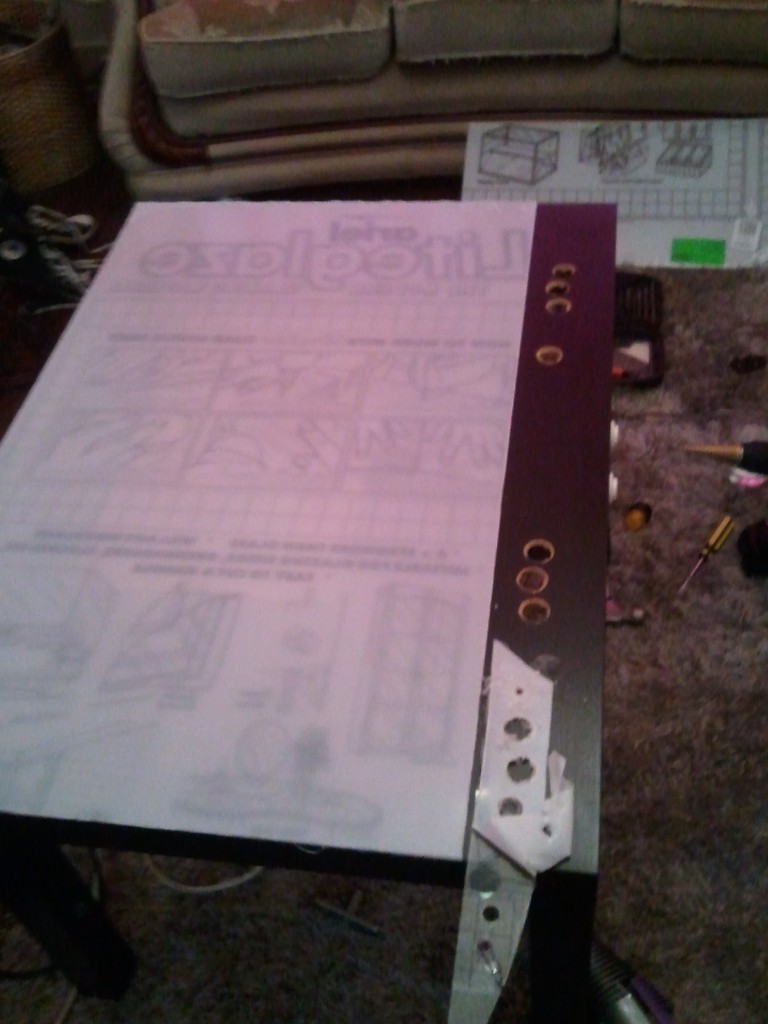
The next step was drilling the holes for the buttons, it was looking quite expensive for all the hole cutters I"d need, in the end I read up on people using a stepped drill bit, which worked out loads cheaper, and saved many headaches later on with the plexi glass. It"s finish isnt the smoothest, but the button caps hide that.
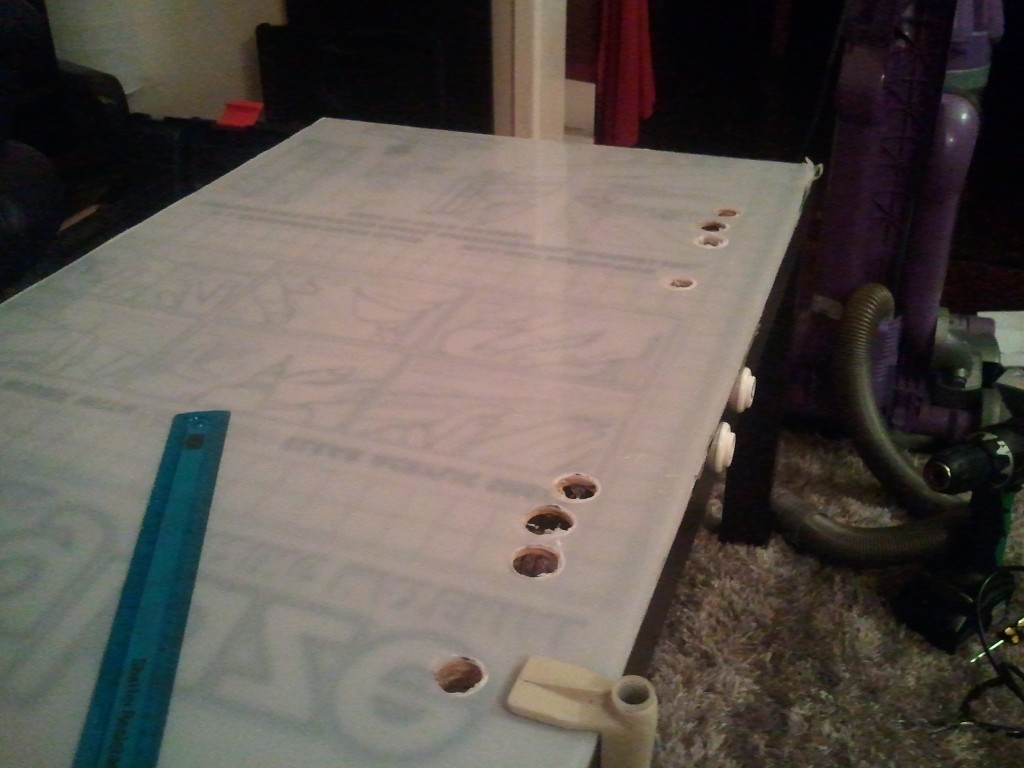
Some more holes were drilled for the player 1 & 2 start buttons,, and here I"m testing a wooden mount for the monitor.
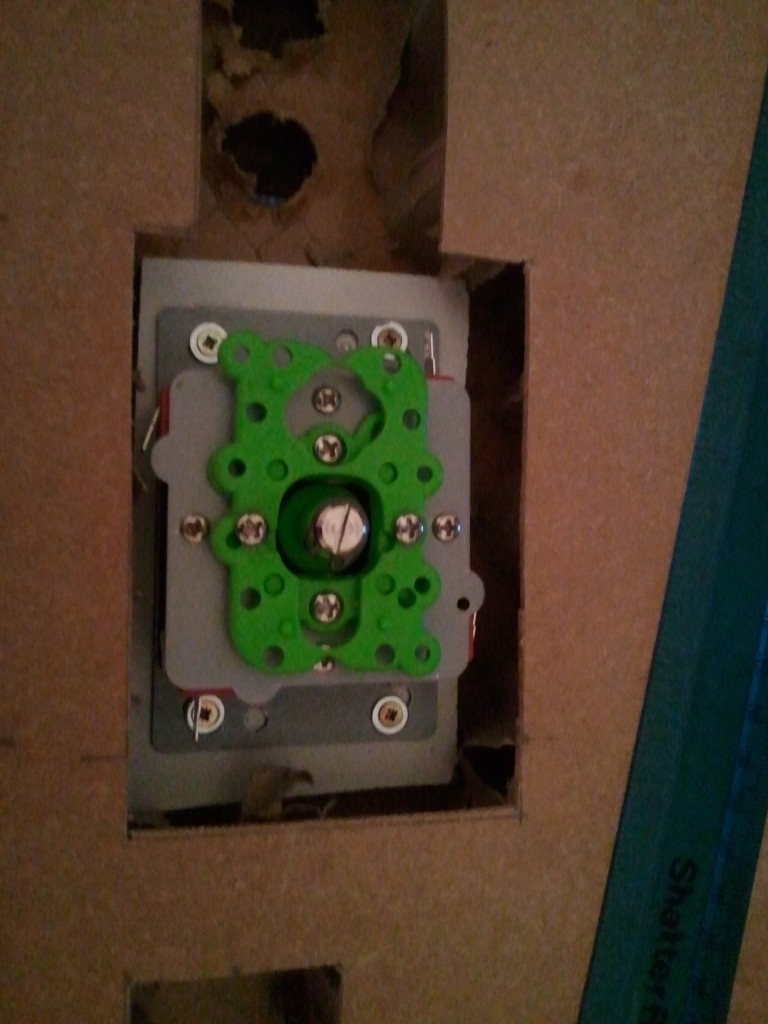
Next came the joysticks, I spent a long time looking up on how to mount them without any screw holes on the surface, in the end I opted to glue some wood to the underside of the table.
The joysticks then screw into the wood holding them in place.
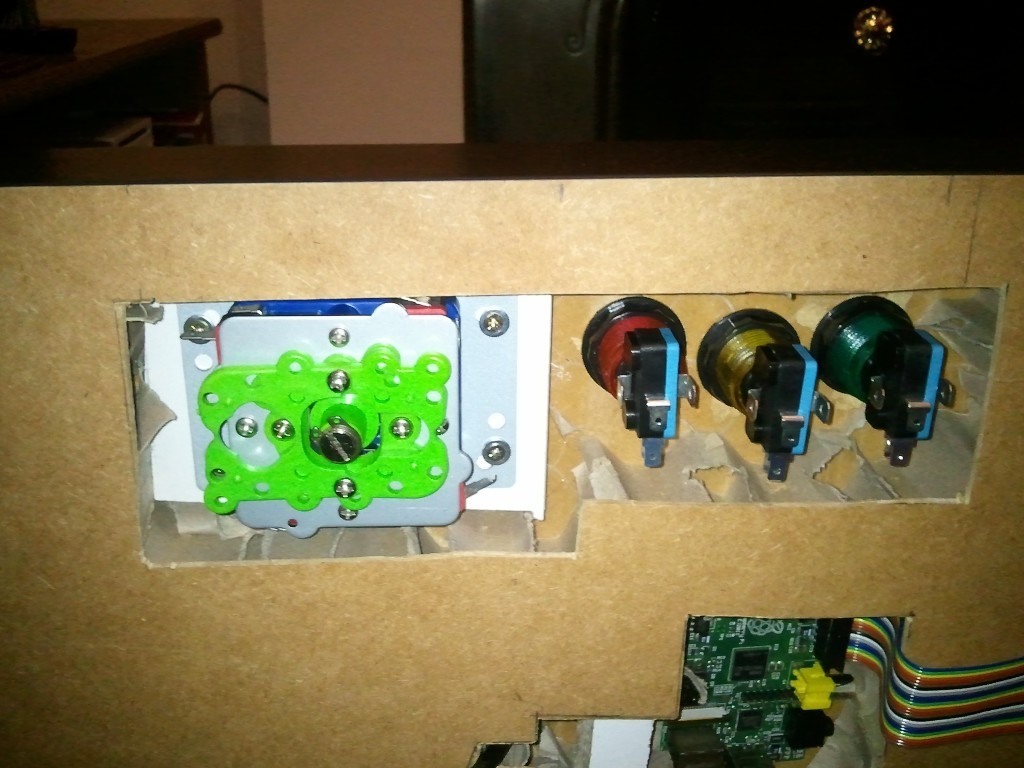
I found a GIPO extender in maplin, it handily allows you insert raw wire into the pins, all 14 buttons will run into this block, a simple script on the pi translates the GIPO signals to a keyboard key presses (
Laying out the Rasperry Pi, the VGA converter and the GIPO pin board
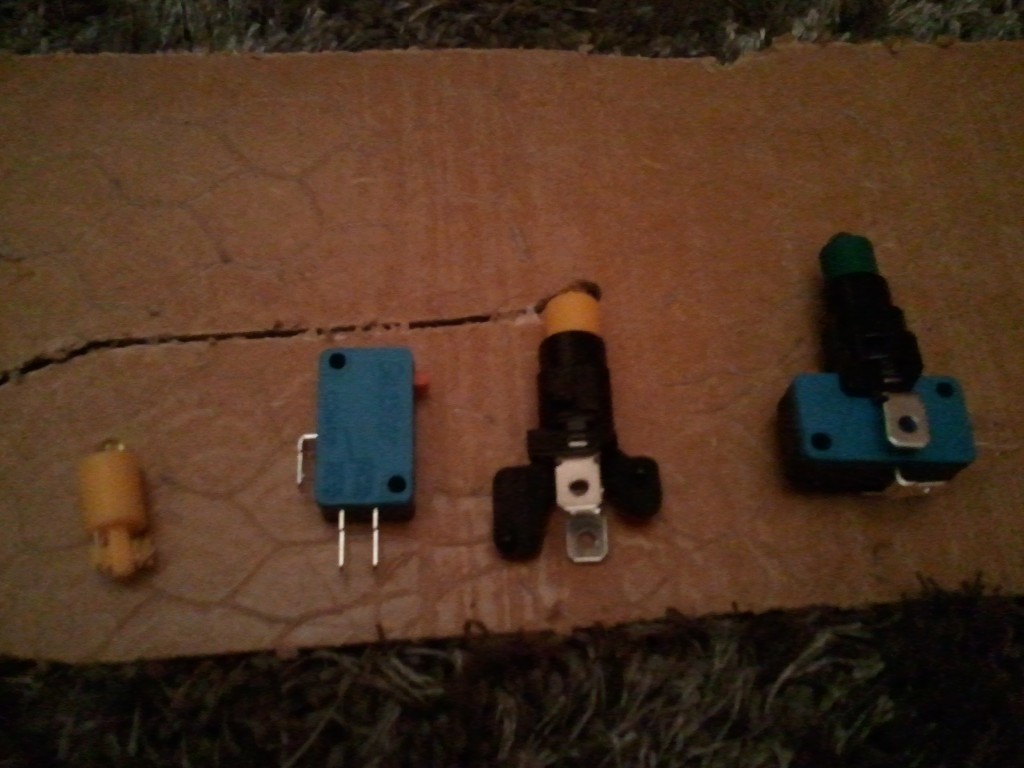
I brought some LED arcade buttons off ebay:
Joysticks and buttons assembled:
Top view:
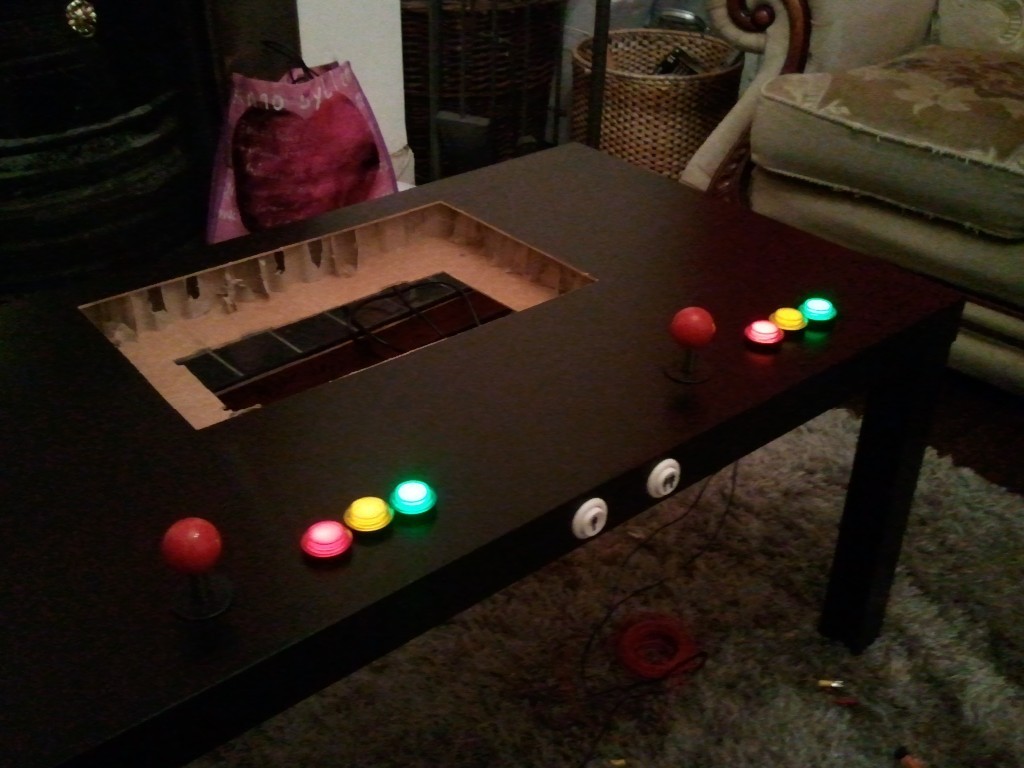
Time for some LED action, I used an old 9v mobile phone charger wired in parallel for each player to power the buttons.
Feels like Christmas:
To protect the screen I opted to cover the table in plexiglass brought from homebase. a lesson to be learnt is you can never scour it enough when cutting it down to size, the first cut show here was perfect, but my second break was not so much, and I was left with some fragments still attached which I had to jigsaw down leaving it very ugly.
Using a scrap bit of plexiglass It dawned on me just how hard this stuff is to drill, if you cut just a little too much at once it cracks, I practiced at least 12 holes before daring with the real stuff. The main take away was to take it very slow, taking a break to Hoover the waste regularly (this sometimes melts and acts a sort of glue between the drill and the sheet resulting it in cracking.)
After a week of drilling every night using the stepped drill bit I finally had the holes cut without any cracks, it was painfully slow. next time I"d probably opt for a design that has the control panel uncovered
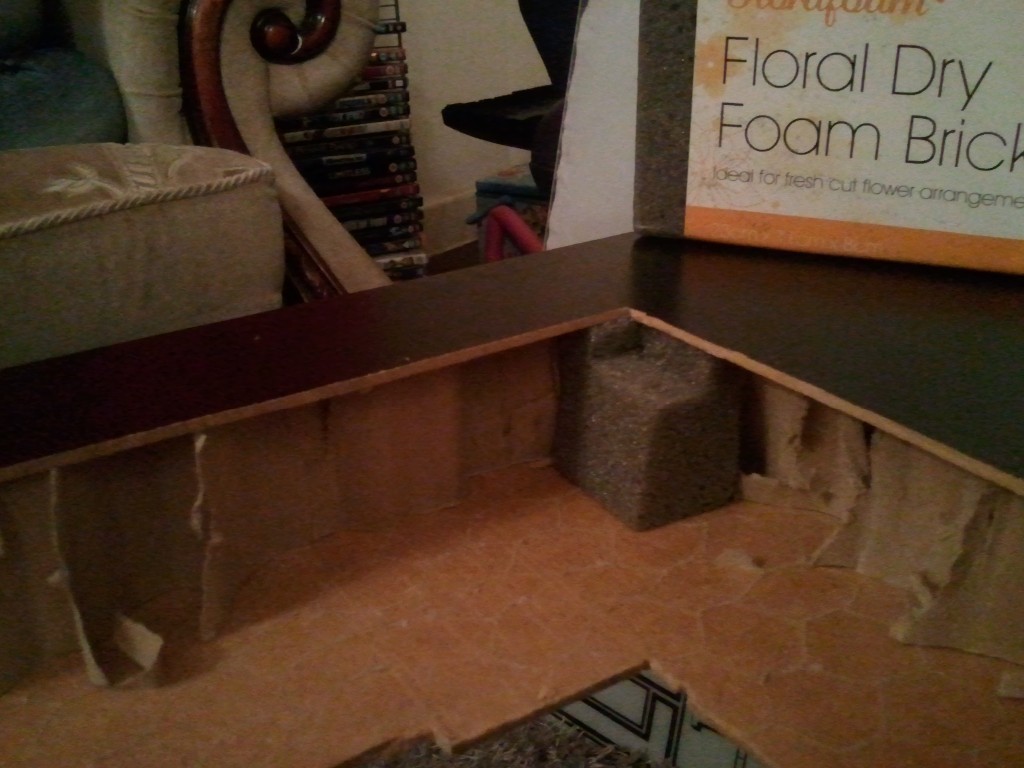
I scrapped my wood mount for the monitor after finding some tough foam in a pound shop, this was a lot easier to mold into mounts with the stepped edges I wanted. The steps were glued at the base.
Wired up, mounted and now testing the monitor with big picture. One thing you cant see is that the monitor is mounted upside down, due to the viewing angles (I learn"t this trick at work!), the videocard rotates the image and no one is the wiser!
I"m currently wiring up the board and controls to the pi, so more pictures are soon to follow!
Here is a quick rundown of the month in which I built Air Luggage, and how I went from concept to release.
New Year"s Resolution
Seeing a post the game dev sub-reddit advertising the One game a month challenge (#1GAM) with the title "Make games not excuses" got me thinking about all the projects in 2012 I had eagerly started, but a few weeks later abandoned as the enthusiasm dropped. As a new year"s resolution I decided to put an end to this, and set myself to completing a game within a month as part of the challenge rules. This meant, no feature creep, no bloat, no "it would be awesome if it did this....".
Game Idea
I wanted the game to be as simple as possible for not only players, but for me to be able finish during the tiny timescale (I only had evenings and 4 weekends to complete it in).
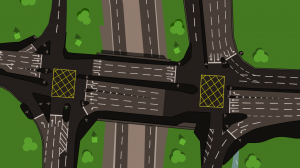
Whilst coding my previous game, in which the player had to keep traffic flowing in a city, I created a way point system for cars to follow, the way points had junctions in which the cars would randomly choose which direction to go in.
Screen-shot of Traffic (2012, Unreleased)
This was when I had the idea for a game where the player controlled which direction the traffic would flow by setting the direction of each junction. This idea was more arcade based than the puzzle game you see today, the bags would appear in random colours constantly and the player had 10 lives to direct the bags into each gate, the rate at which the bags entered would slowly increase until the player ultimately lost. Using this I wrote up the game description as below:
Concept
Using nodes from Traffic, create a new junction switching mechanism to control Y Junctions
Idea is for the player to solve fast paced puzzles of getting coloured luggage to the correct gate
Luggage can be directed onto different treadmills using the switch gates, there is a central feeder system that keeps unsolved luggage in a loop.
Player has to complete each level by surviving the day with minimum of x losses.
At this point of development the games focus involved in changing the junction gates as the bags were moving rather than setting up the gates beforehand. and involved filling up a "progress meter" to complete the level.
The Problem
The trouble with the arcade style was making it fun and varied, once you"ve completed a level, the next would just look a little different, I wanted and needed puzzle solving.
However, I could not find a reasonable way to mesh both ideas together, if the player could change the orientation of the gates at any point, it would mitigate any puzzle as they could just wait until the correct bag came around and flip it accordingly to win. I needed a way to prevent this, and unfortunately this meant letter the player setting up the gates beforehand, and then watching the outcome. I hated this Idea, there was no live interaction or feedback and thus there wasn"t any room for fun game play. After a few days of sleeping on the prospect of removing the arcade element entirely it started to grow on me, and I decided to focus on making a puzzle game.
I started designing the levels and at that point it was clear I made the right decision.
Level Design
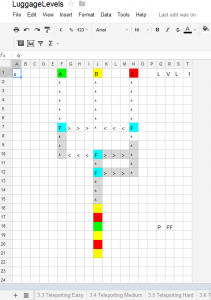
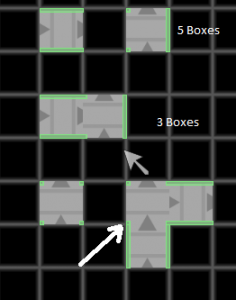
This was surprisingly fun and at the same time a chore, I opted to use a spreadsheet to design the level due to the 2D grid matching the game"s 2D grid. There was no real process involved, except trial and error, and iterating on the previous level adding new elements, Initially I had 2 ideas for junction gates, the "accurator" (count gate) and the flip flop, I designed 5 levels for each thinking later levels will combine both elements to make another 5 levels.
Google Docs Level Design
The hard part was making sure the puzzle was solvable without being too easy or obvious, often I"d relook at a level and realize how to solve it without even using half the gates (this was especially true of the accurator tiles when I decided the players could set the starting direction as well as the number of bags it"ll let though. I also made the mistake of not taking into account the timings of each conveyor, which proved to cause a lot of headaches in development when bags would try and occupy the same tile if the player did not take the "happy path".
I enjoy being able to see behind the scenes so here is the development copy of the Level doc for your viewing pleasure:
You"ll also notice some symbols near tiles (this was to help me remember how to solve my own puzzles)
Code Development
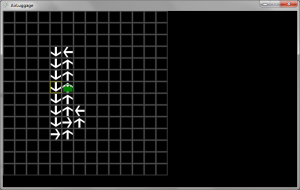
The conveyors were the main focus of the game, so the prototype had a way to place conveyor tiles in 4 directions and have a bag follow the conveyor path, there were no physics or animations at this point, the bag would jump to the next tile every second
3 Hours - Bag moving prototype
If you used the editor in the game, you"ll notice it has not changed much from this screenshot.
I continued developing this prototype adding the flip flop gate and count gate, and tested each of my levels in the level doc, to which I noticed quite a few were unsolvable, or had overlapping bags.
(Sadly I don"t have any screen shots from this point)
Getting physical
One thing that was sitting at the back of my mind was how to make the bags move along the conveyor, I could moved them linearly across tiles, however I was stuck on what happened when 2 bags tried to occupy the same tile, which bag had priority, did they overlap, did they collide?
I knew a way to solve all my problems with 1 stone, but having never properly implementing a 3rd party physics engine before I was very hesitant given my timescale, if it wouldn"t play nice. I opted for farseer, due to it being the de facto for XNA.
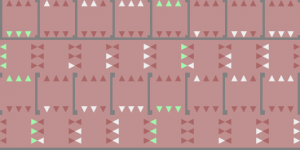
Many hours of setting the collision boxes, masses and friction were needed to try and get more than 1 bag around 90" corners without getting stuck, but boy did it look good.
Farseer rotating and colliding the bags
There"s actually a lot more going on than first appearances to get the effect the bag is travelling on the conveyor, and there is little to no information on the web about how to achieve such movement.
Each bag has 4 points at the edges that are separately checked to see which conveyor they are on, and which direction the conveyor is moving, this allows the subtle rotation of the bag as it changes direction, the direction each point should be moving is stored as a unit vector, and the following code is used to work out how much impulse to add to the angle (all the further rotations and movement is handled by farseer)
float forceLength = Force.Length(); //Force = Direction the corner should be moving in
Vector2 curVel = AttachedBody.LinearVelocity;
Force /= BagCollisonBoxes[0].Count; // Divide the direction force scale by the number of points we re checking (this case it"s 4) so its 25 % influence over the bags direction
float power = Vector2.Dot(curVel, Force) / (forceLength); // Work out how much impulse is needed to make the bag move in this direction (this is already scaled by 25%)
if (power < forceLength)//apply if we"re not at 100% speed
{
Force *= (forceLength - Math.Max(power, 0)); //Difference between our desired vel and current vel
Force *= AttachedBody.Mass;
AttachedBody.ApplyLinearImpulse(ref Force, ref worldPos); //apply force directly at the point
}
The force values and max speed were fine tuned to match roughly the conveyor animation speed, the world has no gravity which completes the top-down look.
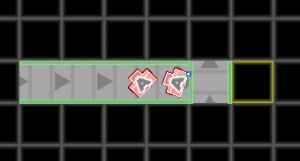
Another problem I encountered was that farseer objects tend to bump off of joins in the solid tiles, so if a bag was sliding along the conveyor wall, between each tile it"ll bounce and rotate off the wall as if it had a dent in the wall. I had to write a collision hull generator that looked across tiles to create a single large solid plane for the bags to collide, each time a level is played this is created on the fly:
As you can see here, the green collision boxes have been simplified if 2 tiles are adjacent to each other. The white arrow shows where the simplification process hasn"t been applied (I didn"t take into account vertical joins as they"d always be a block to the left of this tile to join to in a real level). The hull generation process also has the added benefit of reducing the number of collision meshes the physics engine has to process making it a lot faster. Each tile has it"s own meta-data on what collision edges it has and a simple formula marches though the tiles drawing connected boxes.
The game play code was pretty much complete once the physics engine was in, was just a case of telling each bag a different direction to travel in for the flipflop and other special tiles.
Artwork
I am not an artist, in fact I"m hopeless at art, which is a big problem when making games by yourself. Lucky I get around this by using vector art, which works in a very different way to pixel art (Photoshop etc), every texture in the game is made using lines. Vectors means you can zoom in indefinitely and never get pixel blur, which gives the game a crisp look, vectors are also adjustable, allowing the assets to be tweaked over and over until it looks decent. I also rigorously used color theory, keeping the backgrounds dark and low contrast, and making game objects colourful with dark pin lines to separate them away.
The Menu color pallets where created using http://colorschemedesigner.com/ which use color theory to pick complementing colors.
The tiles were just made with a big tile sheet to keep things simple, I started exploring overlays later in development to do the walls for each tile etc (this is the only tile with fixed collision edges)
January ends
I"m so close to finishing, yet I could not release the game in time for the January deadline, I was still missing the last 5 levels, and knew I needed another tile type to keep things interesting. I had a huge holiday booked in February and in the week I was home I did not have time to do the finishing touches.
March
The project looked to sit on the shelf for all eternity, I still had not come up with a new tile type (How many directions can the bags move) nor had any new level ideas. Eventually I forced myself to sit down and code something, this was the Teleport tile, which allowed matching bags to appear in another location in the level. With another week of work and 2 weekends the game was finally ready to be released.
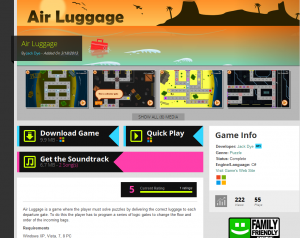
At the time of writing it"s got 200 views and 55 plays on Game Jolt and a 5/5 rating, which is about average given the time on game jolt. For me it"s a personal success being able to finally release a full game, nothing quite beats the feeling of shipping something.
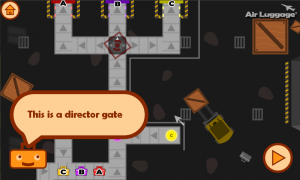
, Air Luggage is a game where the player must solve puzzles by delivering the correct luggage to each departure gate. To do this the player has to program a series of logic gates to change the flow and order of the incoming bags.
Features
18 Levels Ranging in difficulty
Teleports , flip flops, directors and counters to control the flow of bags
Star based level performance awards up to 3 stars a level.
After hearing about the #1GAM challenge I set myself with the goal of actually completing a game I started. I decided a puzzle game would be nice and easy to complete within a month, forking off an idea I came across during a previously project, that focuses on directing the flow of objects. Being a programmer the concept of logic gates made sense to control flow.
I spent a few days stripping the ‘fat’ from the base idea and came up with the 4 gates we see in the game today. Despite spending nearly every night in January as a sole developer the game just missed the mark of a Feb 1
st
Release and this project looked like it was doomed to the ‘nearly done’ bin. However, despite all odds here is V1.0.
In a few days I’ll write up the journey from start to finish of my first full game. I’d like to give a big thanks to Chelnov and Mattashi from newgrounds.com for kindly letting me use their songs and freesound.org for some of the sound effects in the game.
Calculating the area under a curve is a little tricky in computing languages such as c++ or c# due to there not being any direct functions to allow integration. Not wanting to write a whole intergrall solver to complete my project I opted to use an approximation method.
The method I opted for way Riemann sum, invented by a German mathematician, uses many rectangles to approximate the area:
The great thing about using the rectangle approximation is that its incredibly fast to do, as a result many iterations can be used to give a pretty accurate result.
Riemann sum in C++:
The y=x function in the example below represents a deceleration curve an object has to follow (y= Speed, x = Time). I needed to calculate the total distance traveled by the object, as Distance = Speed * Time, the area under the curve equals the total distance traveled.
#define NUM_OF_RECTANGLESTOUSE 10 //The more rectangles used the greater the accuracy
double startX = 0; //starting position on the curve
double endX   = 1; //end position on the curve

double AreaOfCurve = 0;
double lengthX = endX - startX;
double rectangleWidth = lengthX / NUM_OF_RECTANGLESTOUSE;
for(double x=startX+(0.5*rectangleWidth); x < endX; x += rectangleWidth)
{
  //Curve function multiplied by the width goes here: (I've used y=((1/decelTime²) * (decelTime - x)²))
  AreaOfCurve +=  rectangleWidth * ((1.0/(lengthX*lengthX)) * ((lengthX - x)*(lengthX - x)));
}
A great tool to help visualize the Riemann sum and see the difference between the approximation and the actual value can be found on wolfram alpha:
However his approach assumed a graphics engine would take any size image as a sprite map, with myself working in XNA I needed a sprite map that generated images in powers of 2 (32, 64, 128 etc.)
With some tweaking, and learning of JavaScript, I have modified the original to output power of 2 sprite maps:
The script comes in 2 flavors;
Square centric with the generated map being the closest power of 2 in a box layout (Top)
Dimension aware, and filling the maximum possible horizontal texture size before extending vertically (Bottom)
more
The script is compactable with Adobe Photoshop CS3, CS4, CS5 and will have you making animations in no time.
Here I've taken the export images from blender and converted them into a transparent sprite map.
Here's quite a neat trick to calculate if a ray if you have the Ray-Plane collision down. I'm not sure how fast it is compared to other algorithms, but to me it was a logical step from Ray-Plane that I worked out on paper.
First rule of thumb, make the problem 2 Dimensional:
more
As the Sphere is the same shape from all sides, it can easily transform into a 2D circle. Next pretend we are looking at the 2D image of the Sphere from the view of the RayDirection, so the Ray casts downwards into the circle from above.
We can imagine a plane at the centre of the circle with its normal pointing towards the inverse of the ray direction so the plane faces us (The RayDirection). Hopefully now you can see how to solve this once we have the collision point on the plane.
To get the collision point we just do a simple Ray-Plane test with:
RayOrigin
being the rays origin,
RayDirection
being the rays direction
PlaneOrigin
being the spheres origin
PlaneNormal
being (-1)*RayDirection (So it's pointing towards the ray direction)
You may notice that the Ray direction and Plane normal will always point towards each other so they can never be parallel, and the ray will always hit the plane.
What will be returned from the Ray-Plane test is a collision point. This can be subtracted from SphereOrigin to find the distance between the ray collision point and Sphere Origin (Using Pythagoras):
If Collision distance is greater than the spheres radius, then the ray does not intersect the sphere, if it's less than the radius of the sphere, it intersects.
Getting the location of the collision
To retrieve the point of collision on the surface of the sphere (which is 3D and constantly changes) We simply find how far the collision point is from the edge of the sphere:
Difference = Radius - Collision Distance
And subtract this from our lambda time calculated from the ray-Plane calculation:
One of the most fundamental algorithms in 3D games is being able to calculate the arbitrary distance between a point with direction and a plane.
A few key concepts to understand is:
The plane is infinite in length
Unless the ray is parallel to the plane, the ray will eventually hit the plane (due to it being infinitely long)
Despite the guarantee of hitting the plane the ray still may hit the plane behind the point you started your ray from.
more
You can see we have 4 Vectors:
Ray Origin
– Is where the ray is starting from (I.E the end of the barrel in a gun)
Ray Direction
– Is a normalised vector describing which direction the ray points
Plane Normal
– The inverse slope of the plane in normalised length (similar to the Ray Direction)
Plane Translation(Plane Origin)
– I say translation because if the plane wasn't positioned it would always intersect at the origin, so it has to be moved in the world to where we want our plane to be, Its best not to think it as a point (as the plane has infinite points along it) but a translation of the whole plane from the origin.
Mathematicians at this point would love to get out their algebra and differentiate the equations to find out when these 2 'lines' meet, but it computer graphics it's often way too slow and cumbersome to bother with algebra solving. Instead we stick to the basics of physics and maths.
We start of by using a Dot product:
Basically the dot product can be used to tell us how 2 normalized vectors converge with each other, in that if a dot product gives 0 it means the both vectors are
perpendicular
to each other (I.e. not moving towards one another), if -1 or 1 they are
parallel
(Moving towards or away each other at full 'speed'), and all values in-between show the rate at which they are pointing to each other. Remember this is a scalar value, so think in 1 dimension:
If we dot product the
Ray
direction with the
Plane Normal
, we get a scalar value of how the direction is moving towards the
plane
, if it is 0 we know the direction is parallel to the
plane
(90 degrees to the plane's normal), and thus the ray will never hit the plane (We can stop the detection here if this is the case). However any value other than 0, the direction vector is moving at that amount towards the plane, and will hit eventually.
Anyone who has experience in physics will know the basic equation of
Distance = Speed * Time.
We can use this to find out when our
Ray
is going to hit the plane, if it takes negative time, we know the origin of the
Ray
started past the plane and wont intersect it.
But our ray does not have speed?
This is true, but speed is a fancy word for
Rate of change,
so by substituting the scalar value from the dot product, you get the
Rate of changetowards
the plane.
Because of this, it is important to note that Time should not be considered 'time' at all, but rather a value that represents how much 'rate of change' we need to cover a distance (distance/speed).
Now you might think you can get the distance by subtracting the
plane origin
and
ray origin
. However, the
plane
is infinite in length, and the plane origin is actually just a random point on the plane - which could be anywhere. What we need is the point on the
plane
that is
closest
to the
ray origin
, then we can measure the time it takes to travel this distance.
We can actually skip a step at this stage and directly work out the correct distance to the closest point by using the dot product of the
T = D/S Time = DistanceToNearestPointOnPlane / SpeedTowardsPlane
This Time value will now represent the amount of
RayDir
needed to get between the
RayOrigin
and the P
lane.
If its negative, the Ray origin was behind the plane, and so the Ray does not intersect the plane
If it is positive, a collision occurs, at this value along the ray.
Collision Point
To get the exact point at which the ray hits the plane is easy:
RayOrigin + (Time * RayDir) = Collision Point (XYZ)
The above image shows how the calculation works if Time was equal to 3. The blue dot being the RayOrigin. (It has been flattened into 1 Dimension for illustration)
Tip:
If your
RayDirection
is of unit length, you can directly compare lambda/time values from multiple Ray-Plane calculations to see which occurs first.
Also this works for 2D lines EXACTLY the same way! just omit the Z value in calculations or leave it 0;